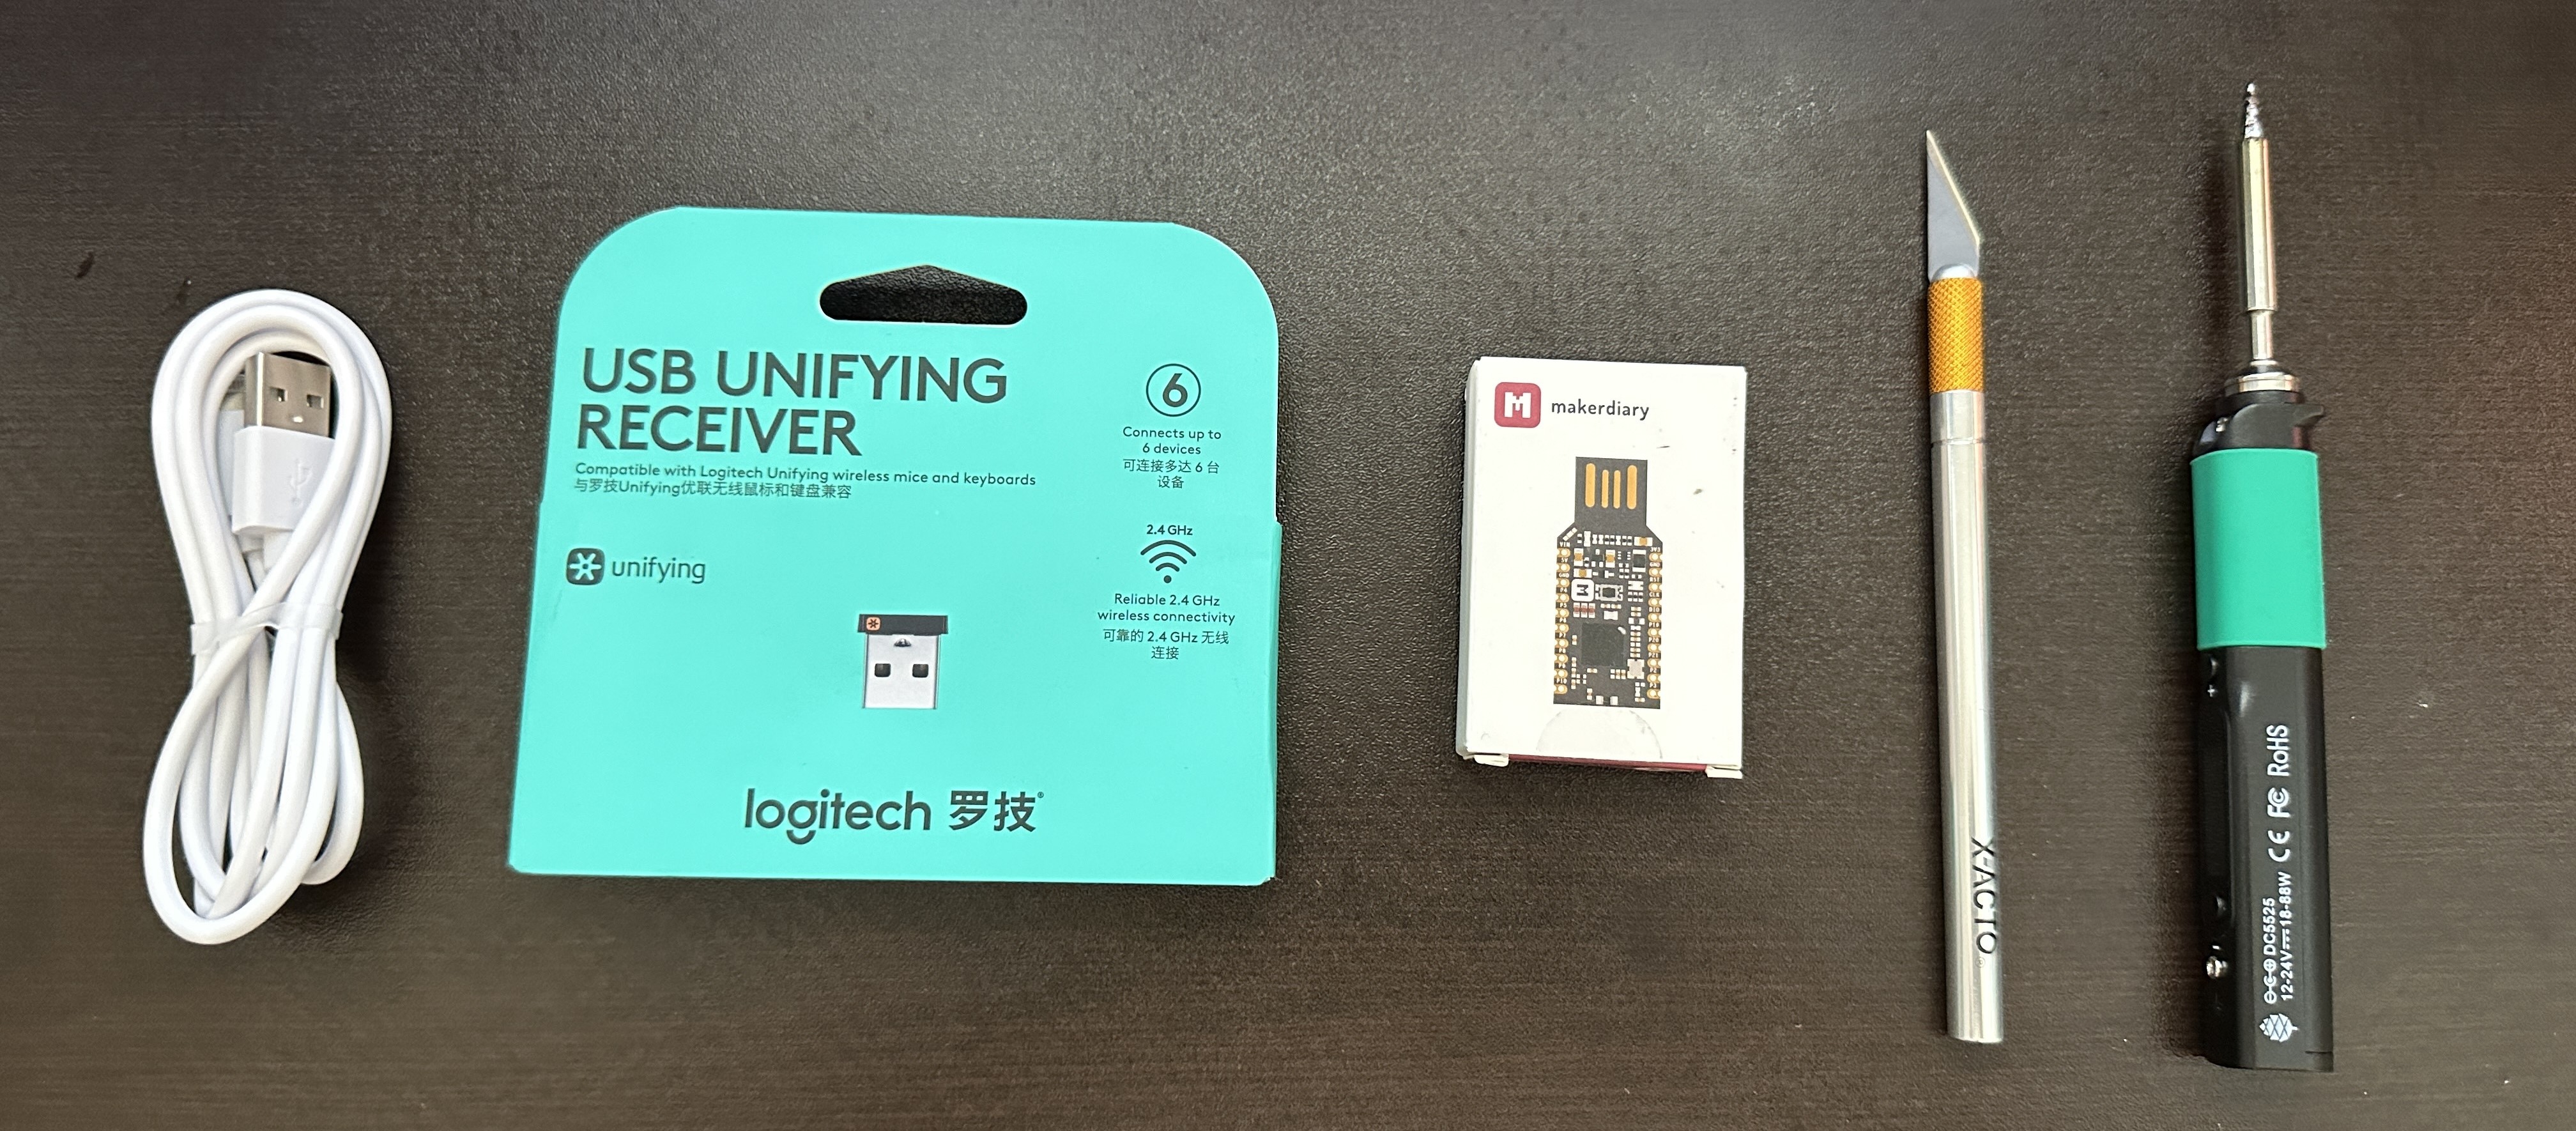
My unsuccessful attempt at making a malicious USB cable.
Background lore
During my webpen internship this summer, I would often find myself peering over at our mobile neighbors, drawn in
by their projects. Their desks always looked like some electronics recycling facility, with piles and piles of
hardware that they were testing. I had absolutely zero experience with hardware, but being able to physically
interact with the thing your supposed to break sounded like a fun time. Eventually, I found some time to watch
them work for an afternoon. The team was working on an OMG cable demonstration for our monthly cybersecurity
awareness all-hands.
Upon returning home that evening, I found myself scouring the internet for some continuation of the project.
OMG cables, however, were quite out of my budget, at almost $200 a pop. Then, I stumbled upon this
blog by
Luca Bongiorni. This project checked all the boxes, from its low cost to its extremely hands-on nature.
Unfortunately, I was in Texas and my soldering iron was in California, so my project had to wait.
Why did I fail?
Ambitious
If I could go back in time to before I started (so like, 4 hours ago), this would be the one word I would repeat to myself.
No prior soldering experience aside from my through-hole keyboard kit? Ambitious. Ordering random parts on Amazon that should do
the trick despite my lack of hardware knowledge? Ambitious. Nothing to hold the USB connector down while I soldered so I just
tried to race the cooling of the solder? Ambitious.
But then again, this is how I start all my projects. I learn best when I’m struggling and gasping for air (metaphorically) so I
wouldn’t change a thing (except maybe getting a set of pliers)…
How did I fail?
I was hoping that I would be writing about how I successfully approached this project, but clearly I did not succeed, so here’s
how not to do it. An anti-tutorial, if you will.
My optimistic, “this will go in my blog later!” start :D
The “brute-force” chapter
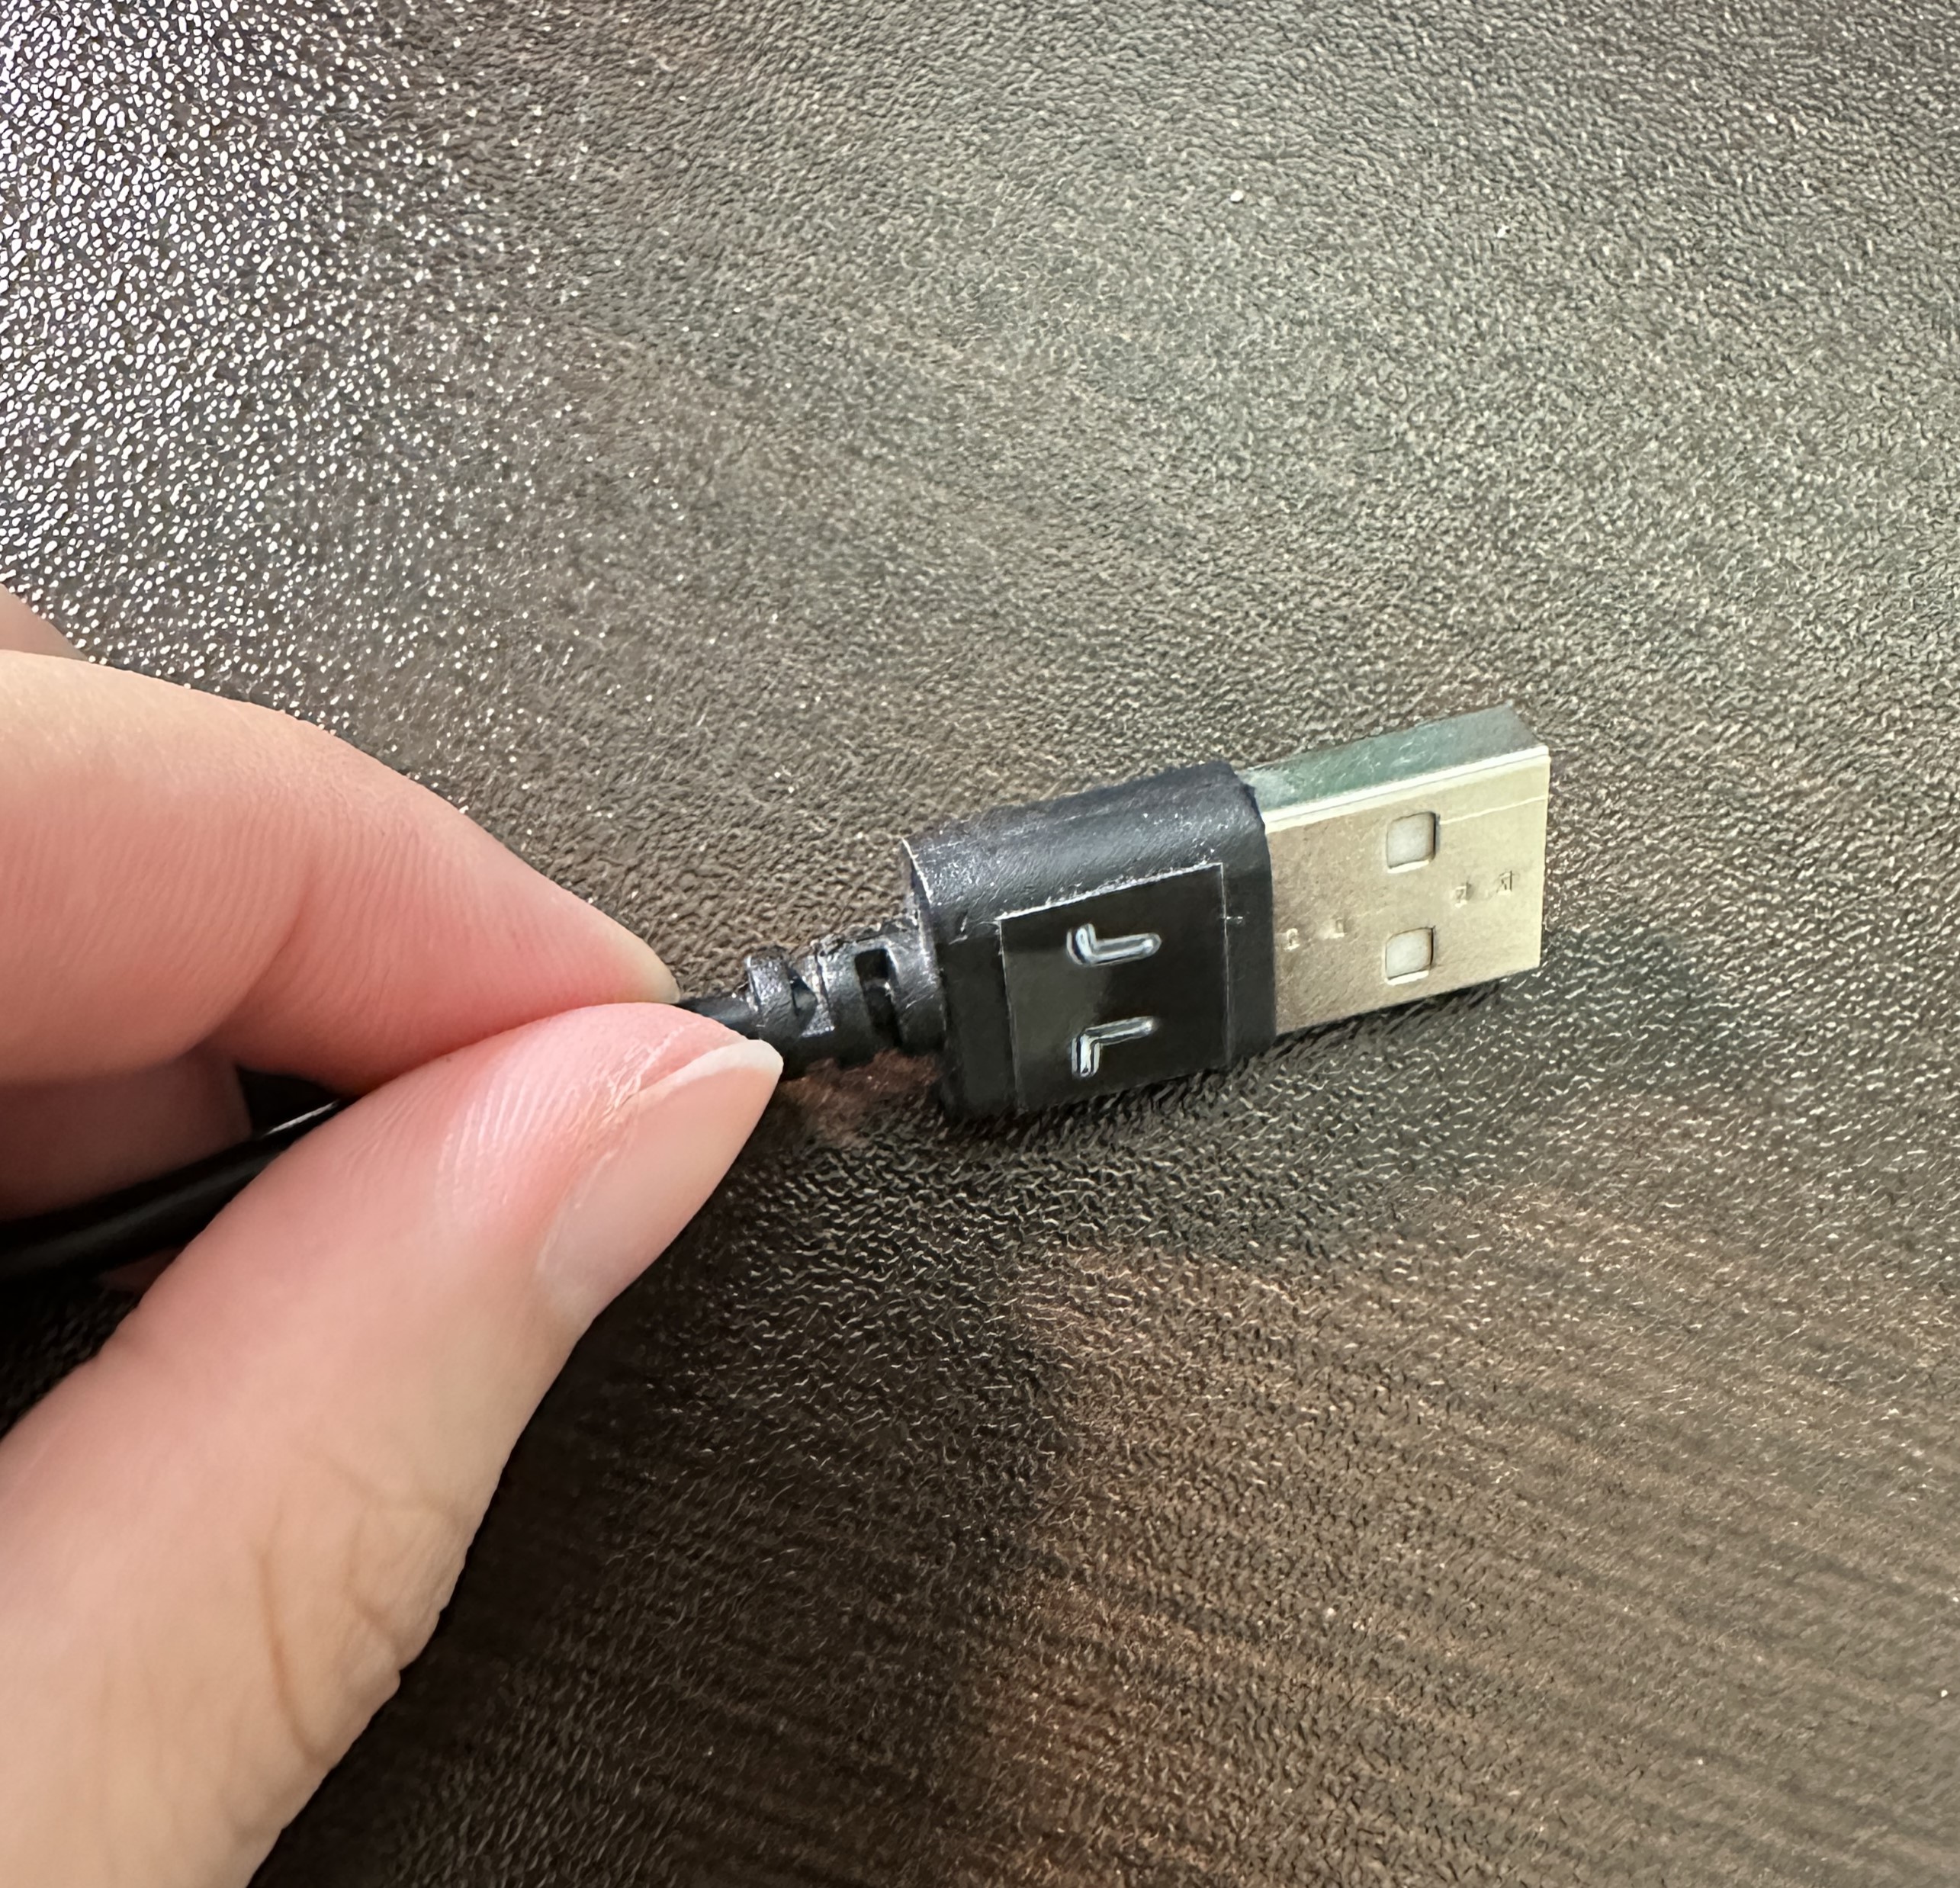
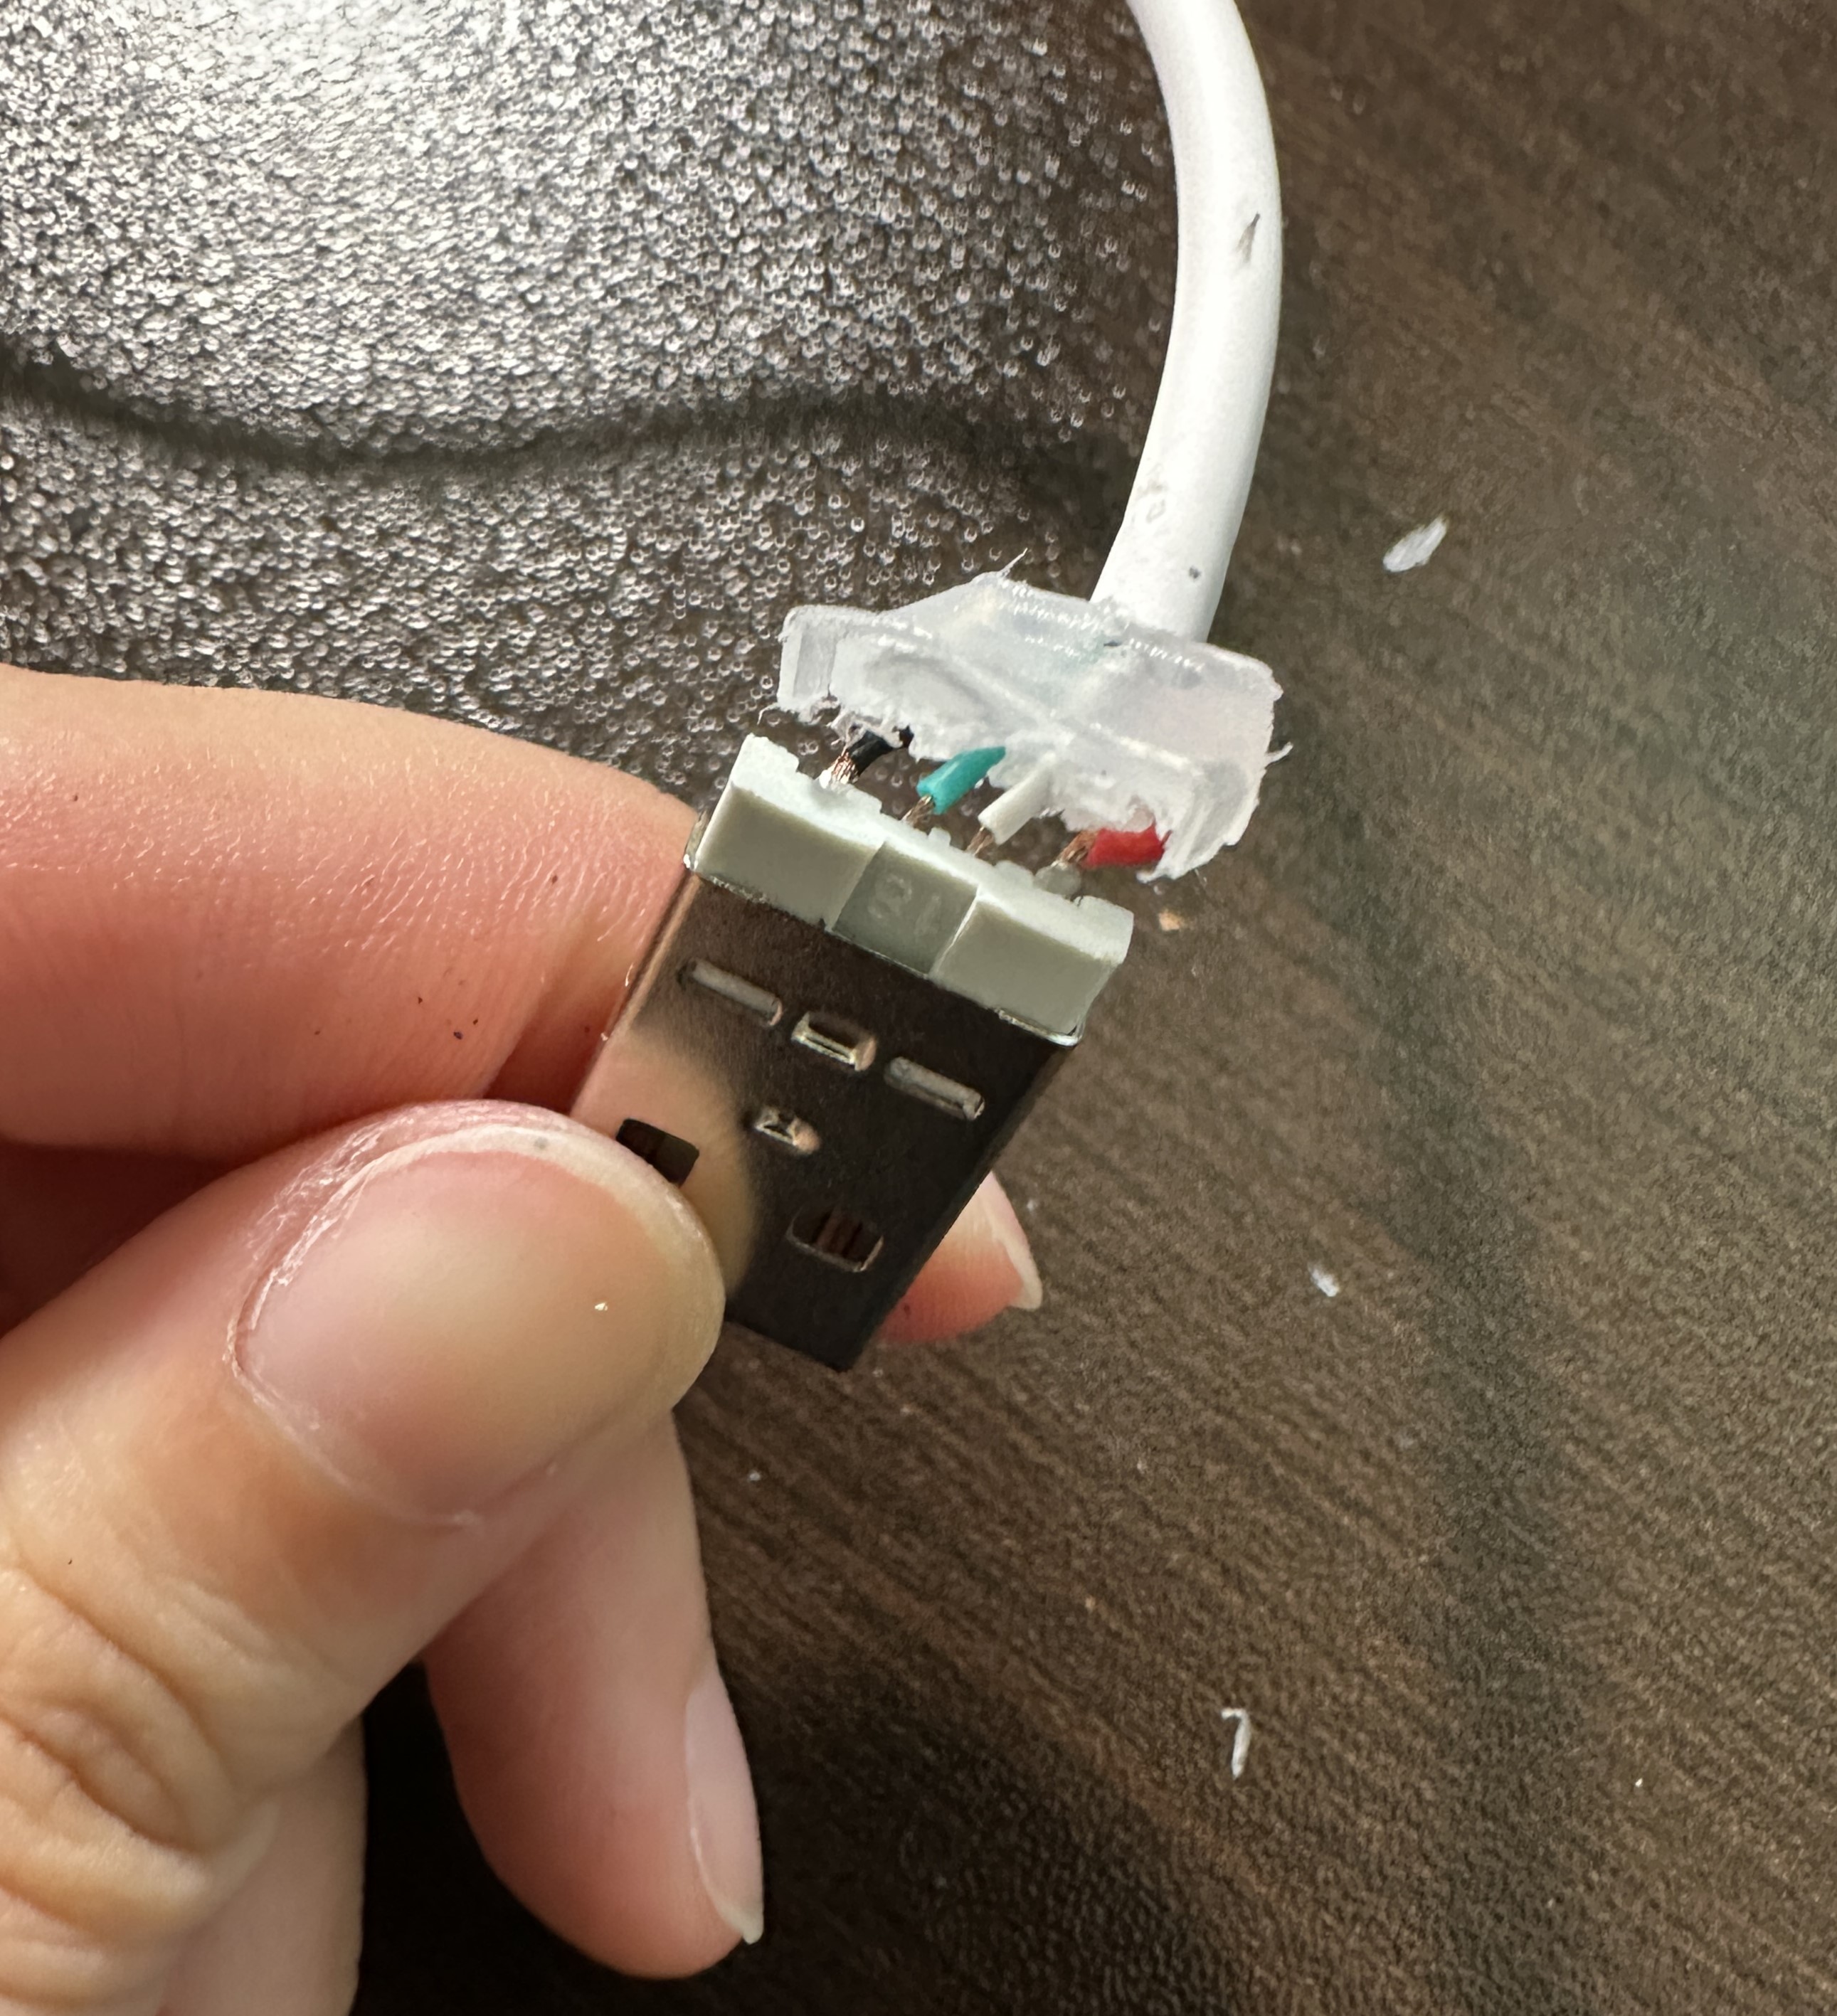
Before we get into the fun stuff, we have to abuse some cables. Using a scalpel, I very calmly and patiently removed the connector
from its chassis… Very very calmly… This step did not upset me at all…
When ordering the cable on Amazon, I intentionally purchased a cheaper and seemingly lower-quality cable, as I knew I would have quite a
lot of dissecting to do. Well, it turns out I purchased the worst cable for the job.
After struggling with the chassis that ended up being a lot more difficult to cut than I anticipated, I peeled back the plastic to reveal this horrific sight…

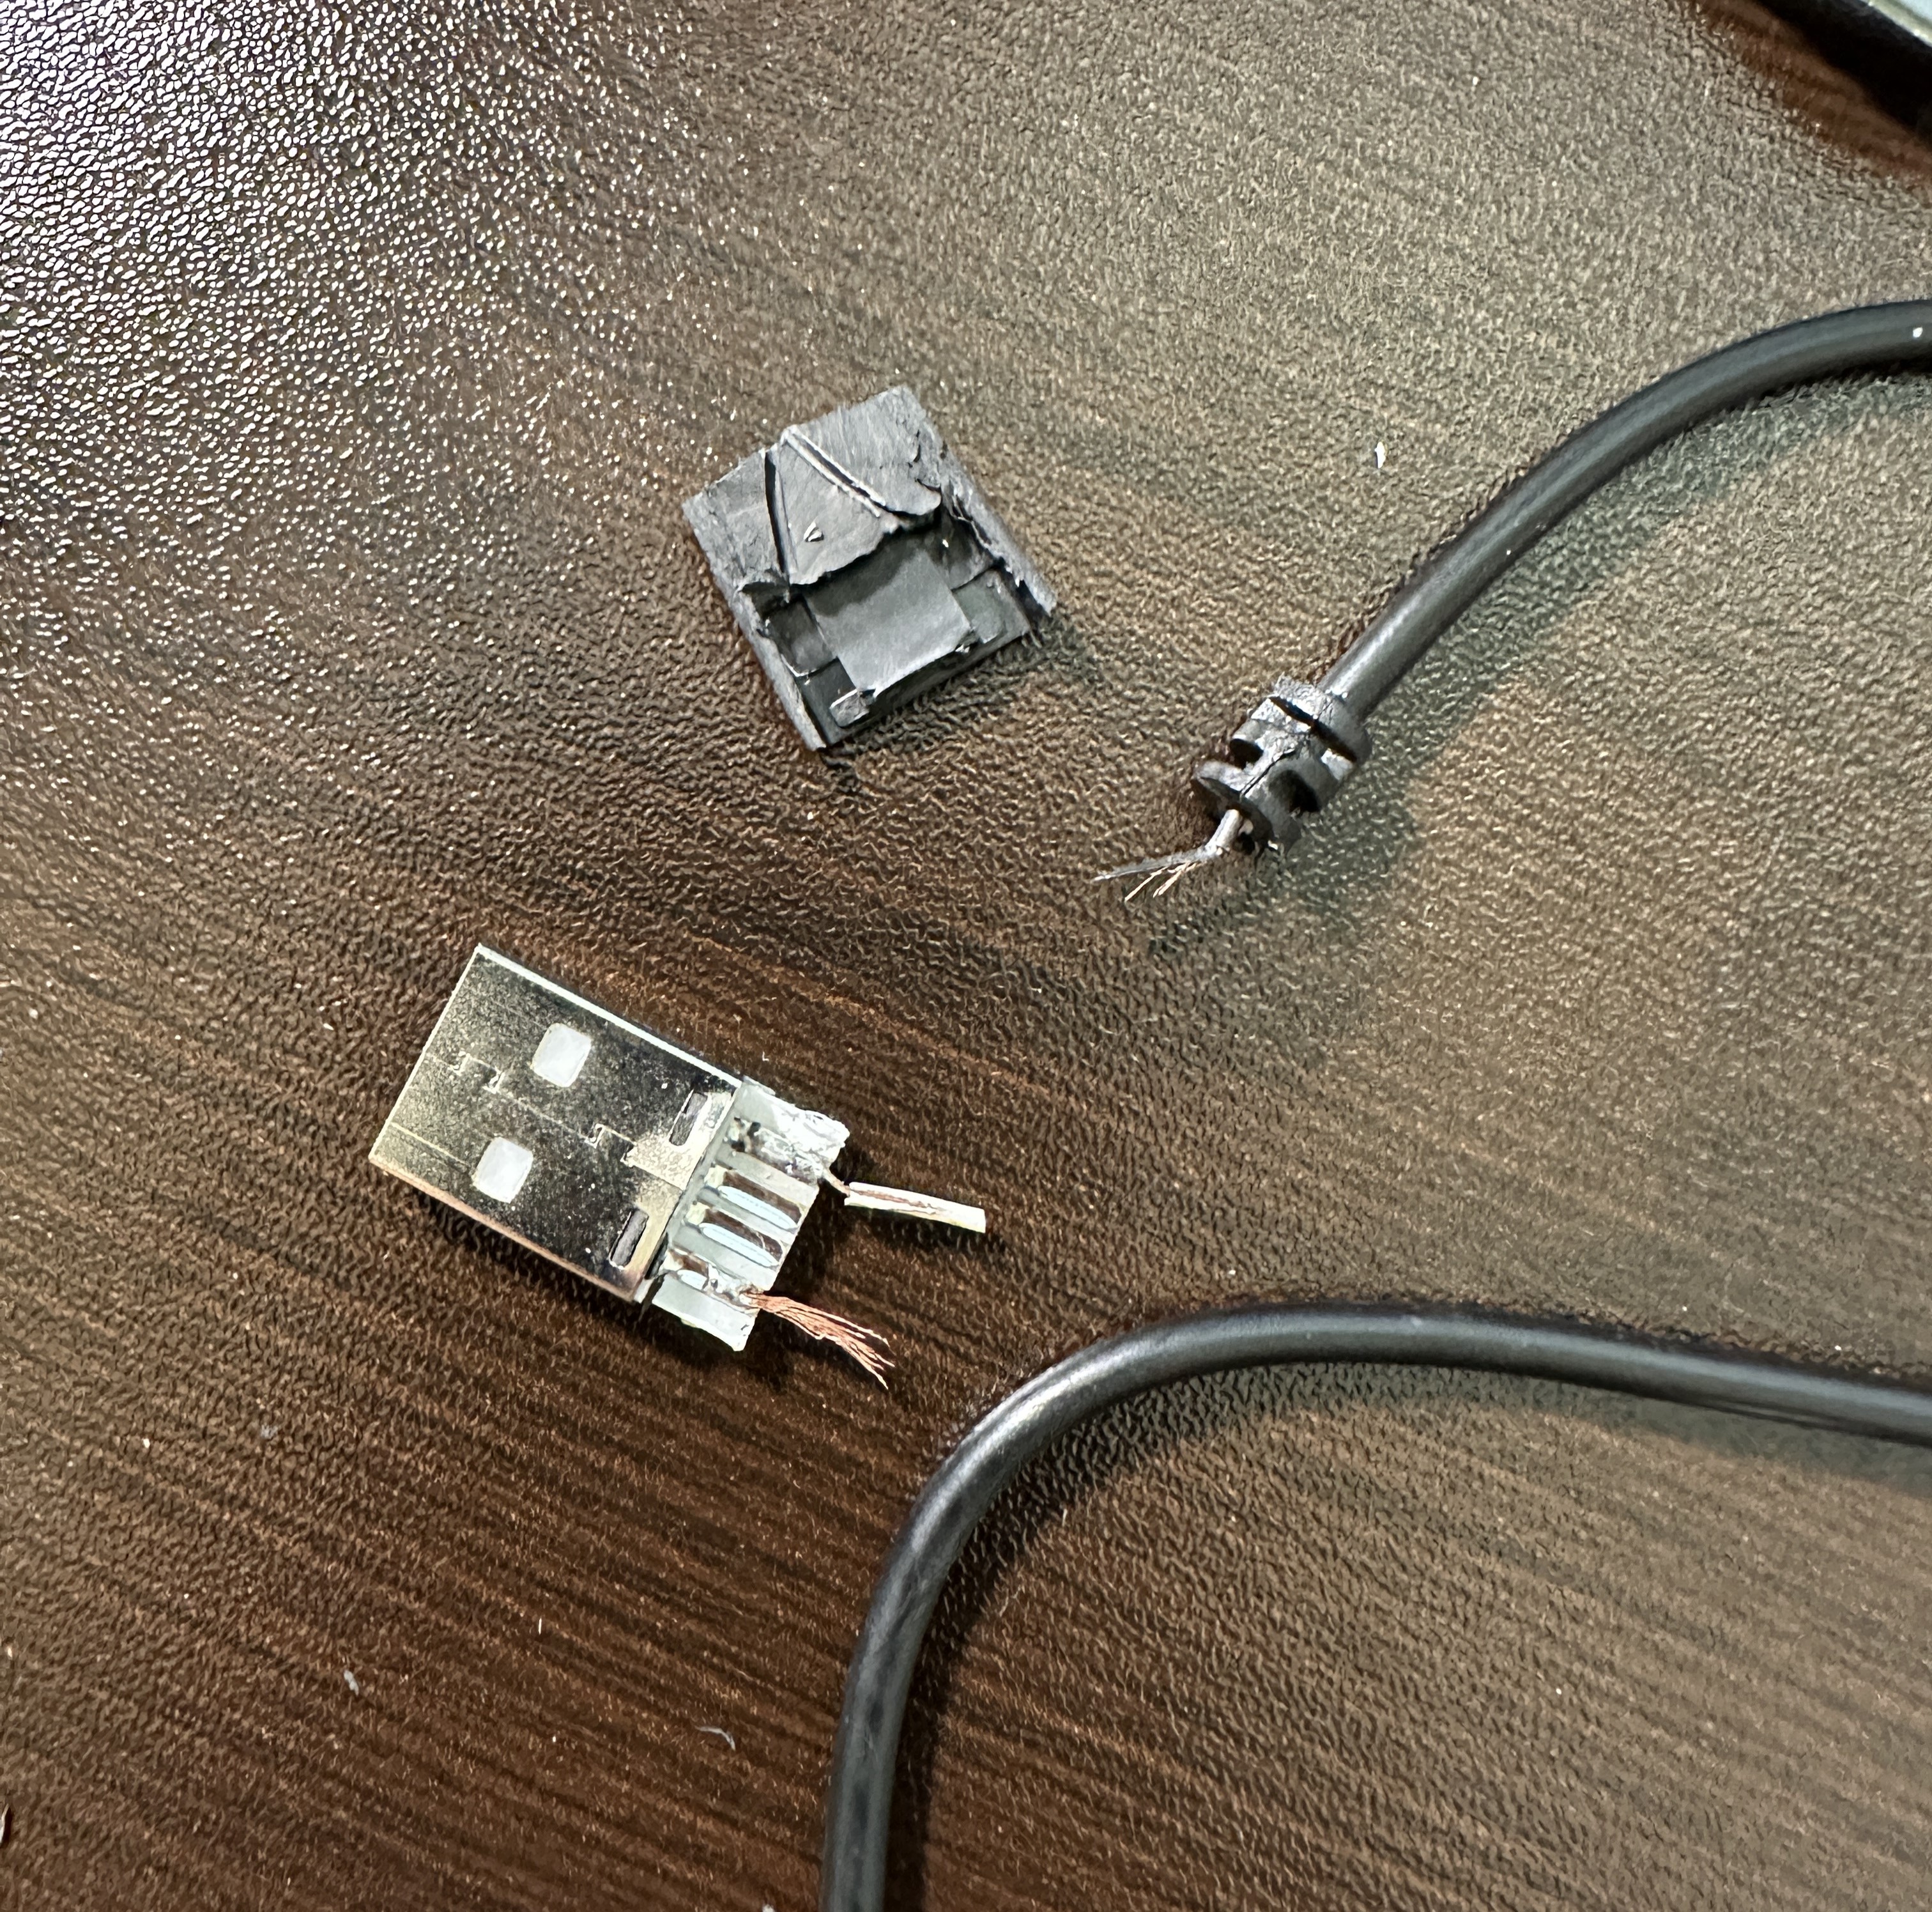
The cable manufacturer, in opposite-of-Chinese-manufacturing fashion, decided to encase the components of the cable in more hard plastic…
They literally injected more plastic into the chassis, creating the most indestructible cable ever. To the manufacturer’s credit, this is
all you could want from a cable from a consumer’s perspective. However, for once, I actually wanted my cable to rip apart easily. There’s
nothing more defeating than struggling to cut something open for ten solid minutes, only to reveal a second round of defense.
At this point, I turned my sights to other cables in my possession, admitting defeat to this Protection IV cable.
I quickly found this cheap USB-A to C cable and got to work. (Also yes, I label all my cables… No, I’m not a psychopath, I just work mostly
in group settings and I’m tired of losing my stuff… Plus, it’s super satisfying to have everything labeled and organized… Okay maybe I am slightly crazy)
Well… Let’s just say that I expected to apply the same amount of strength to this cable as I did to the one before…
…and ended up completely mutilating it.
If I had half a brain in this moment, I would have recognized that it really isn’t that big of a deal… I could’ve just soldered the wires
back and called it a day. Keyword: had. I in fact had no brain and decided to try my luck at the indestructible cable again.
I began the painstaking process of scraping away at the perfectly-molded plastic, taking great care not to disrupt the wires it was protecting
(again, if I had a brain at this point, I would’ve just cut it off and soldered the wires back). Oh well, at least it took me back to when I
spent hours brushing away at sand because I thought I could become a paleontologist.
As you can see, they really weren’t playing around with this layer of plastic… Eventually, after endless scraping, gnawing, and prying, I freed the components of their evil plastic jacket.
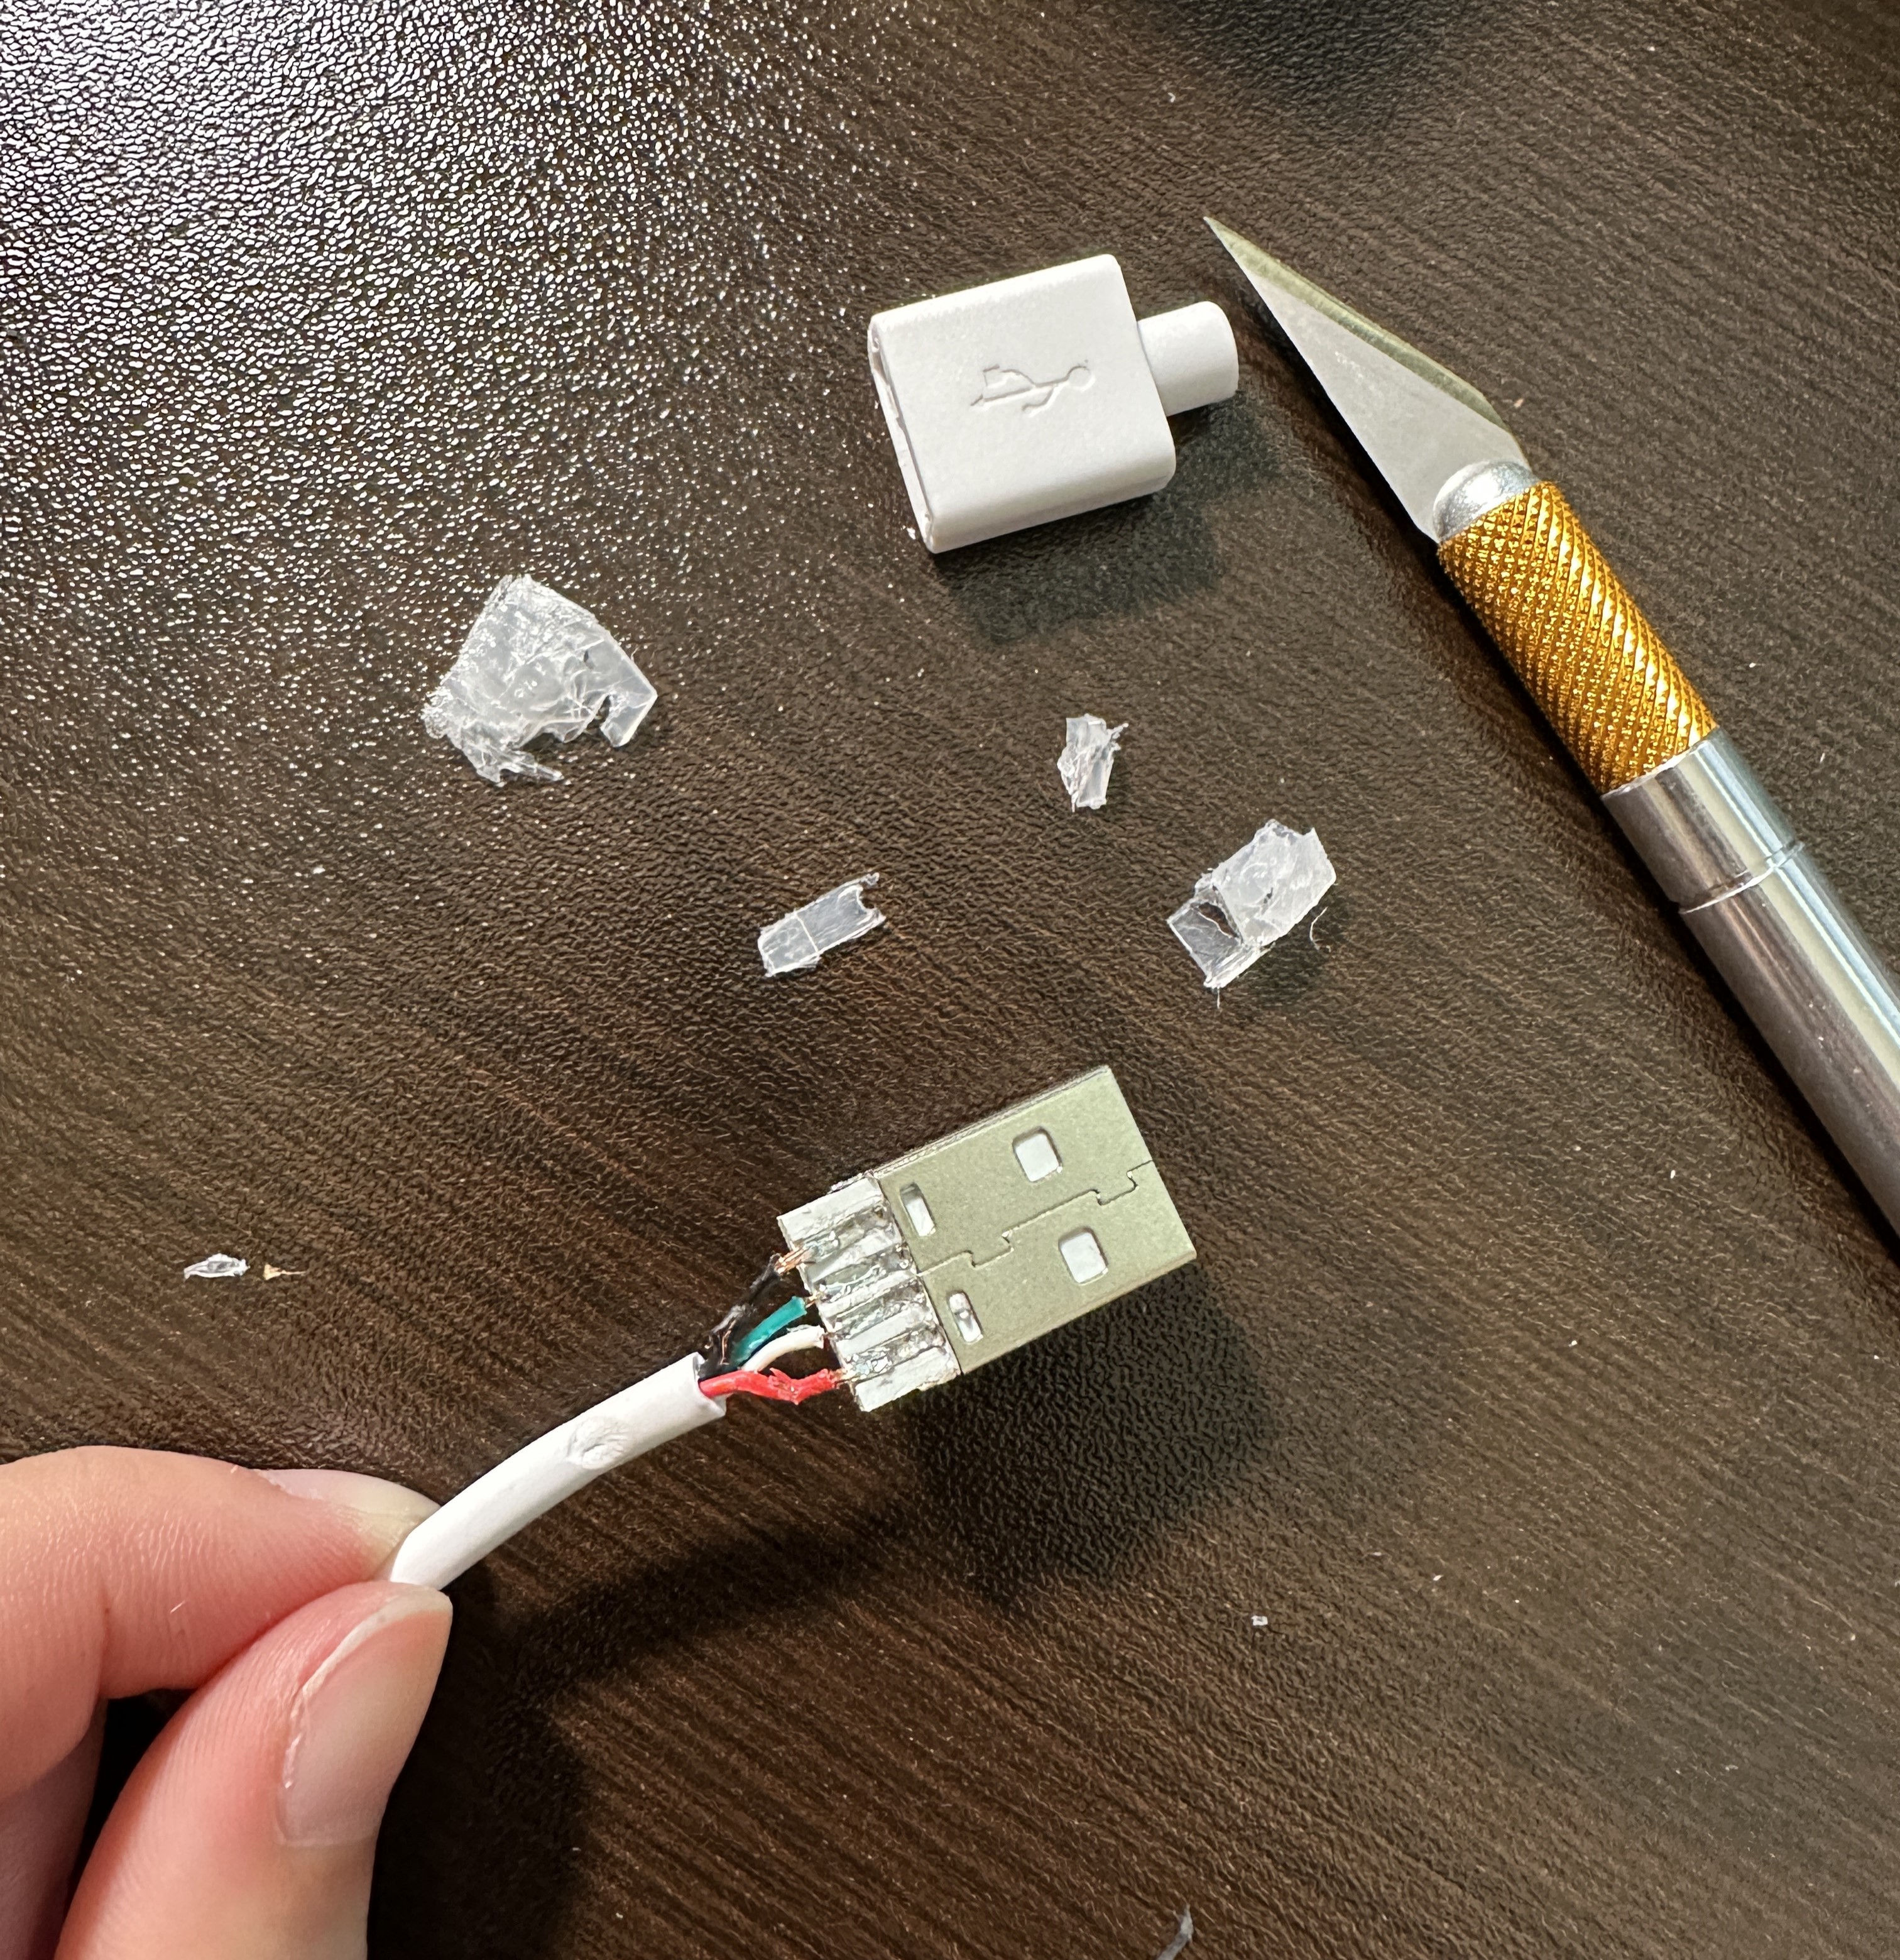

Thank you, Hong Kong engineering…
The second “brute-force” chapter
Oh you thought I was done? Nope. We still had the dongle to remove from its chassis.
There’s no way this is worse than the cable…
Hah. Silly Jessica. This was worse.
Since I did not have pliers, my method to free the dongle was rather barbaric. Using my trusty scalpel again, I began sawing at the
solid plastic casing. Once an incision was made, I then used my nails to pry open the case.
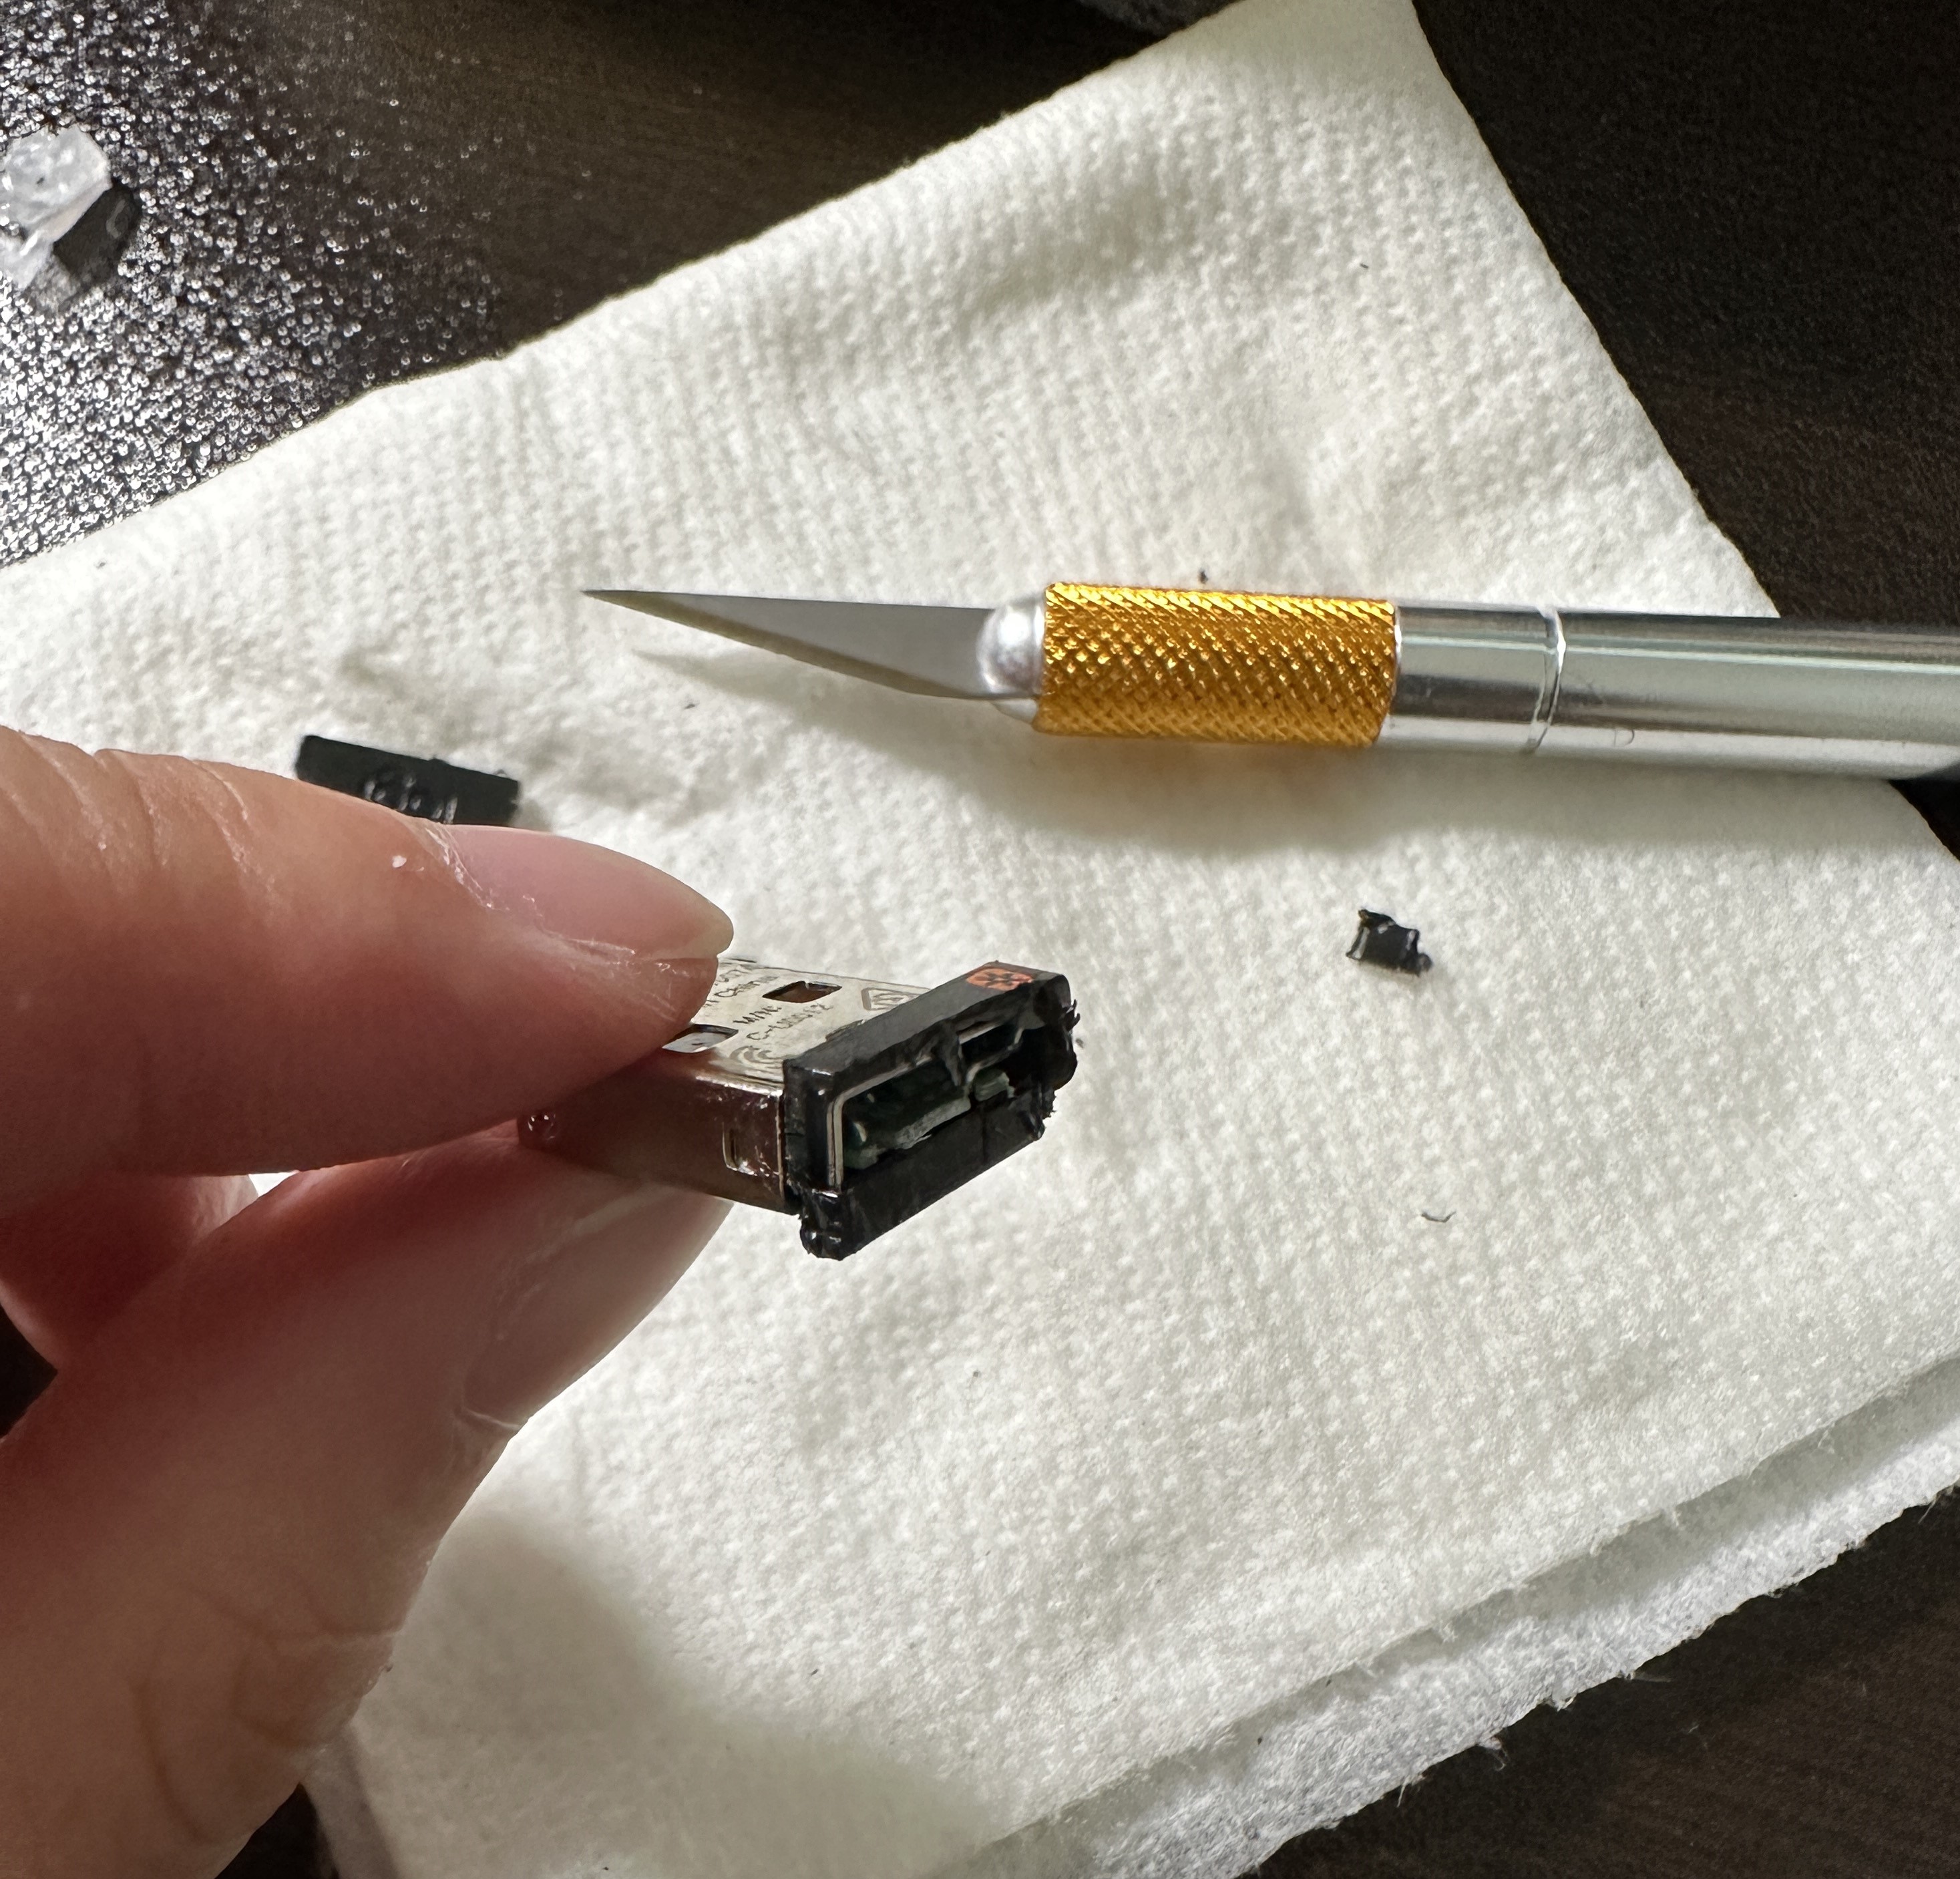
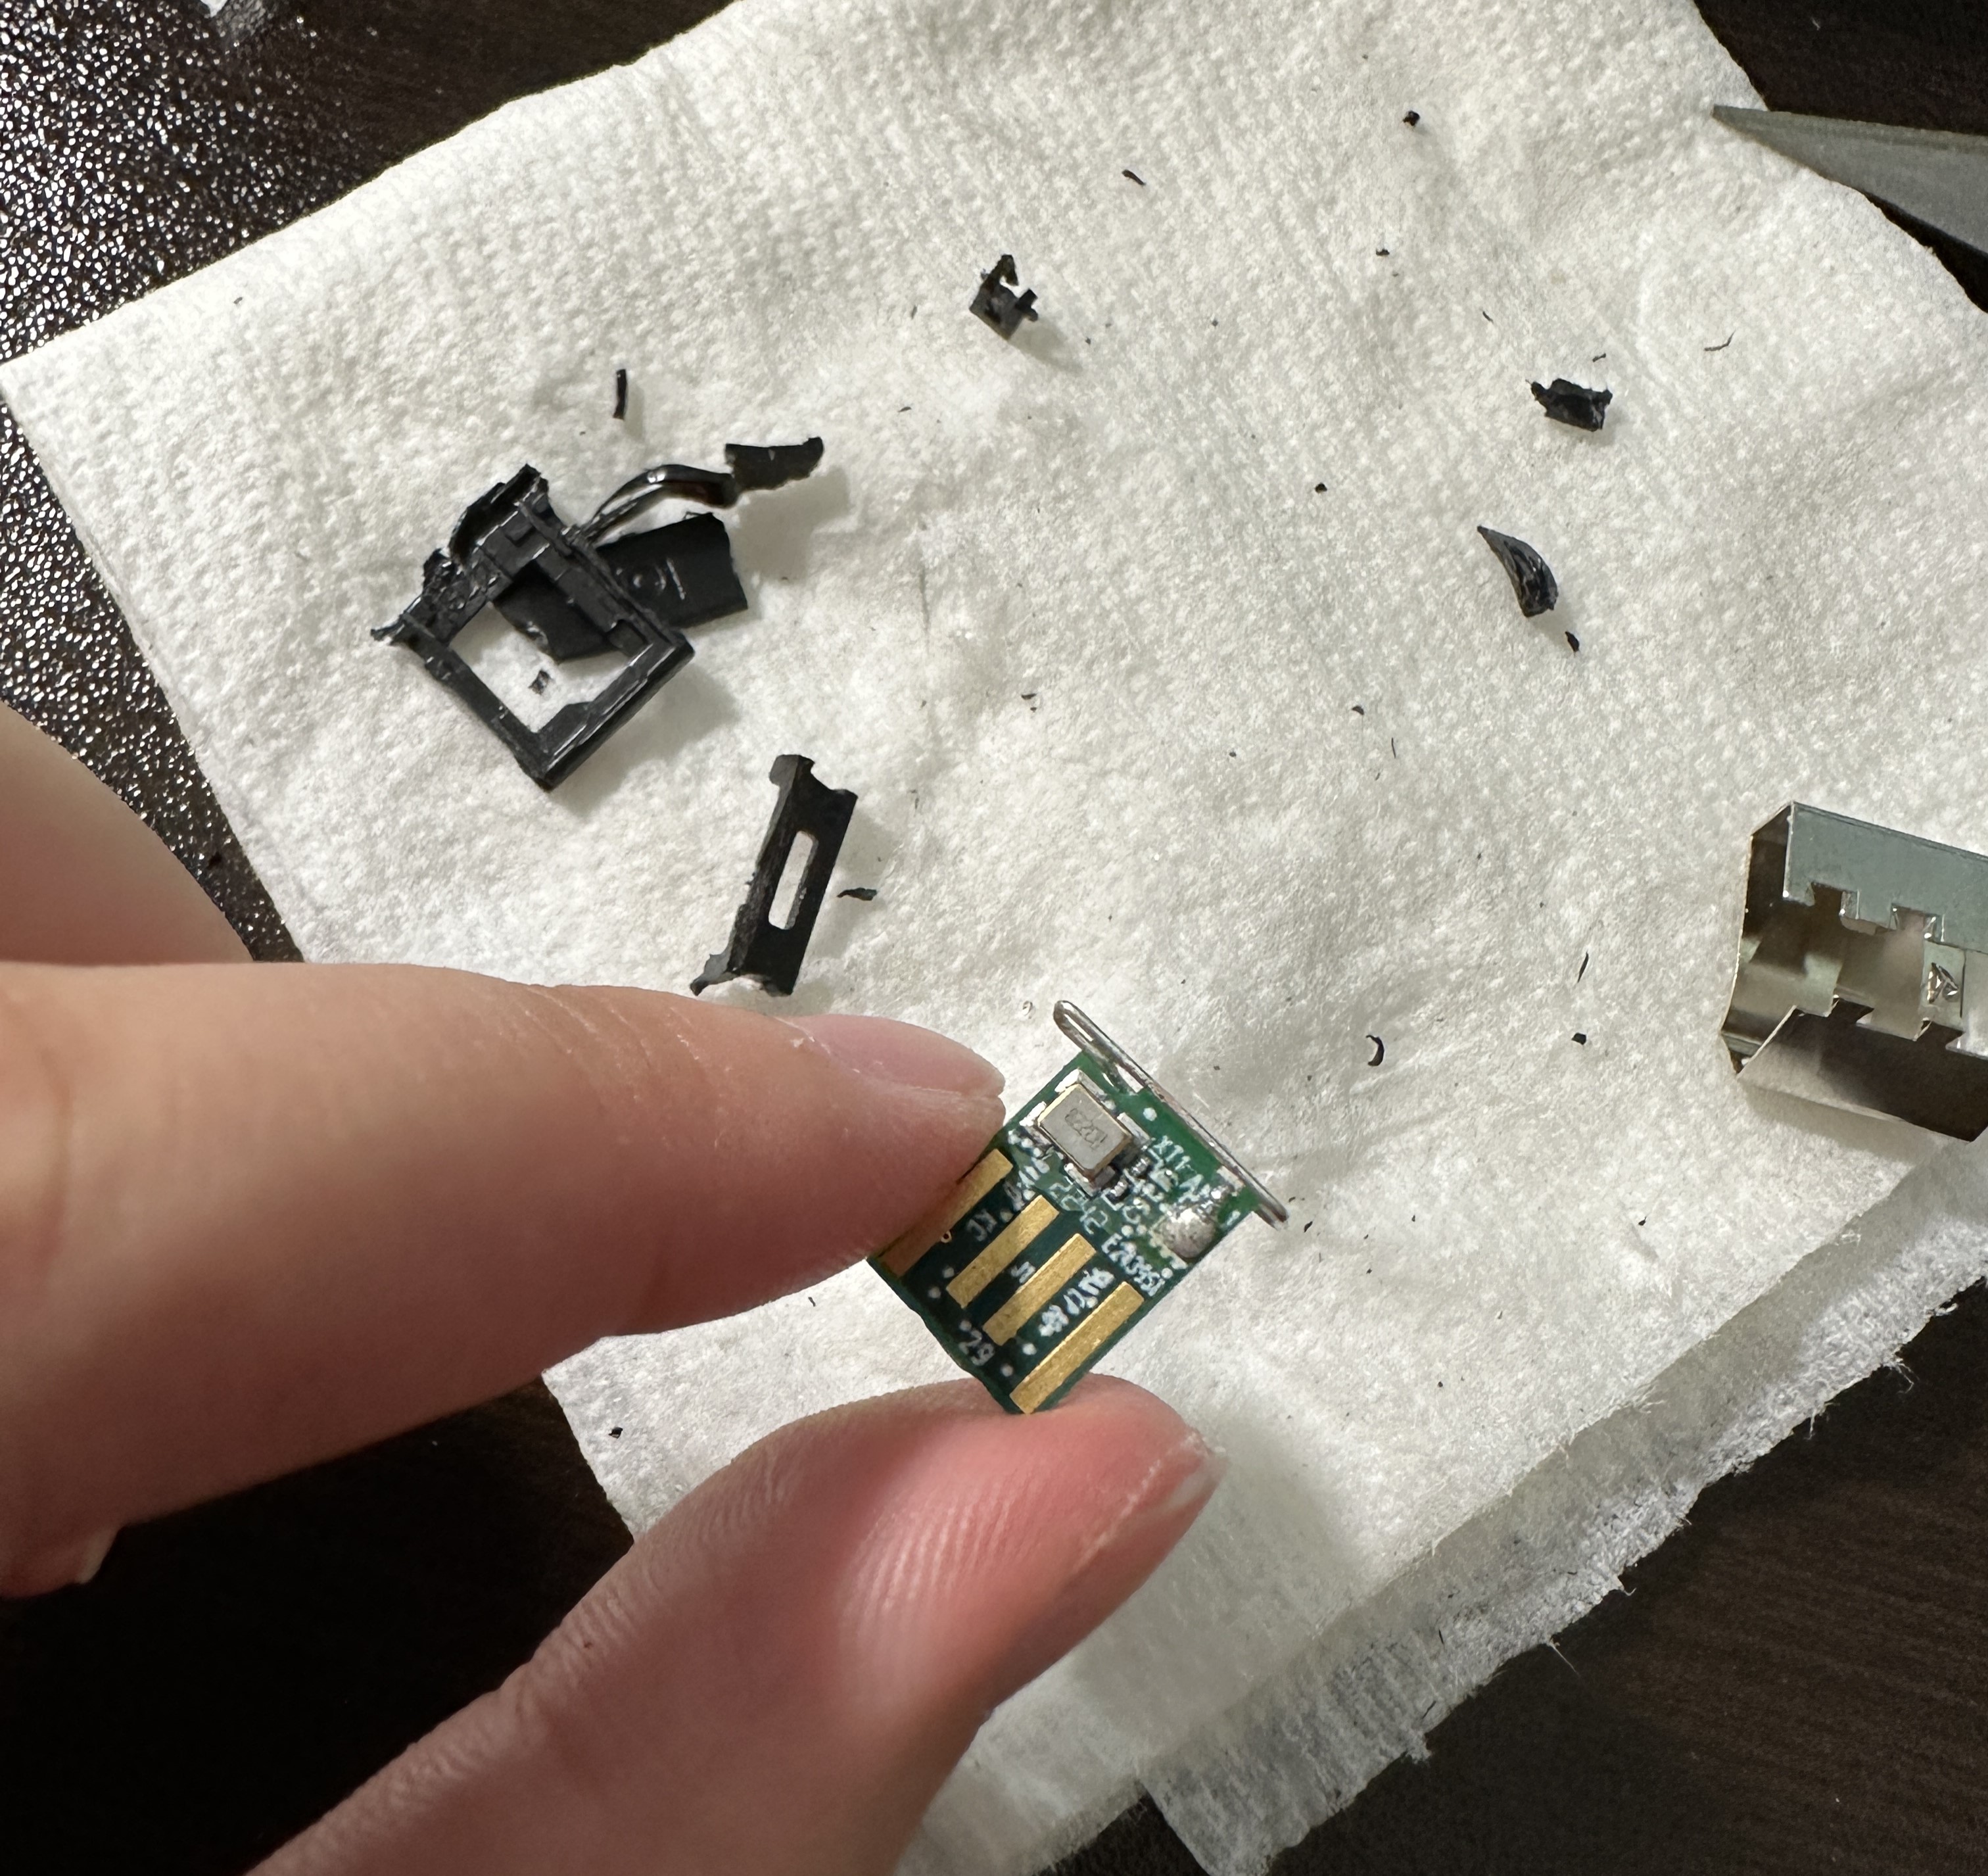
Let’s just say that there was a lot more sawing and prying than I had anticipated until the dongle was eventually freed. The
following image shows the aftermath of such brutality. My thumbs are still incredibly sore from this.
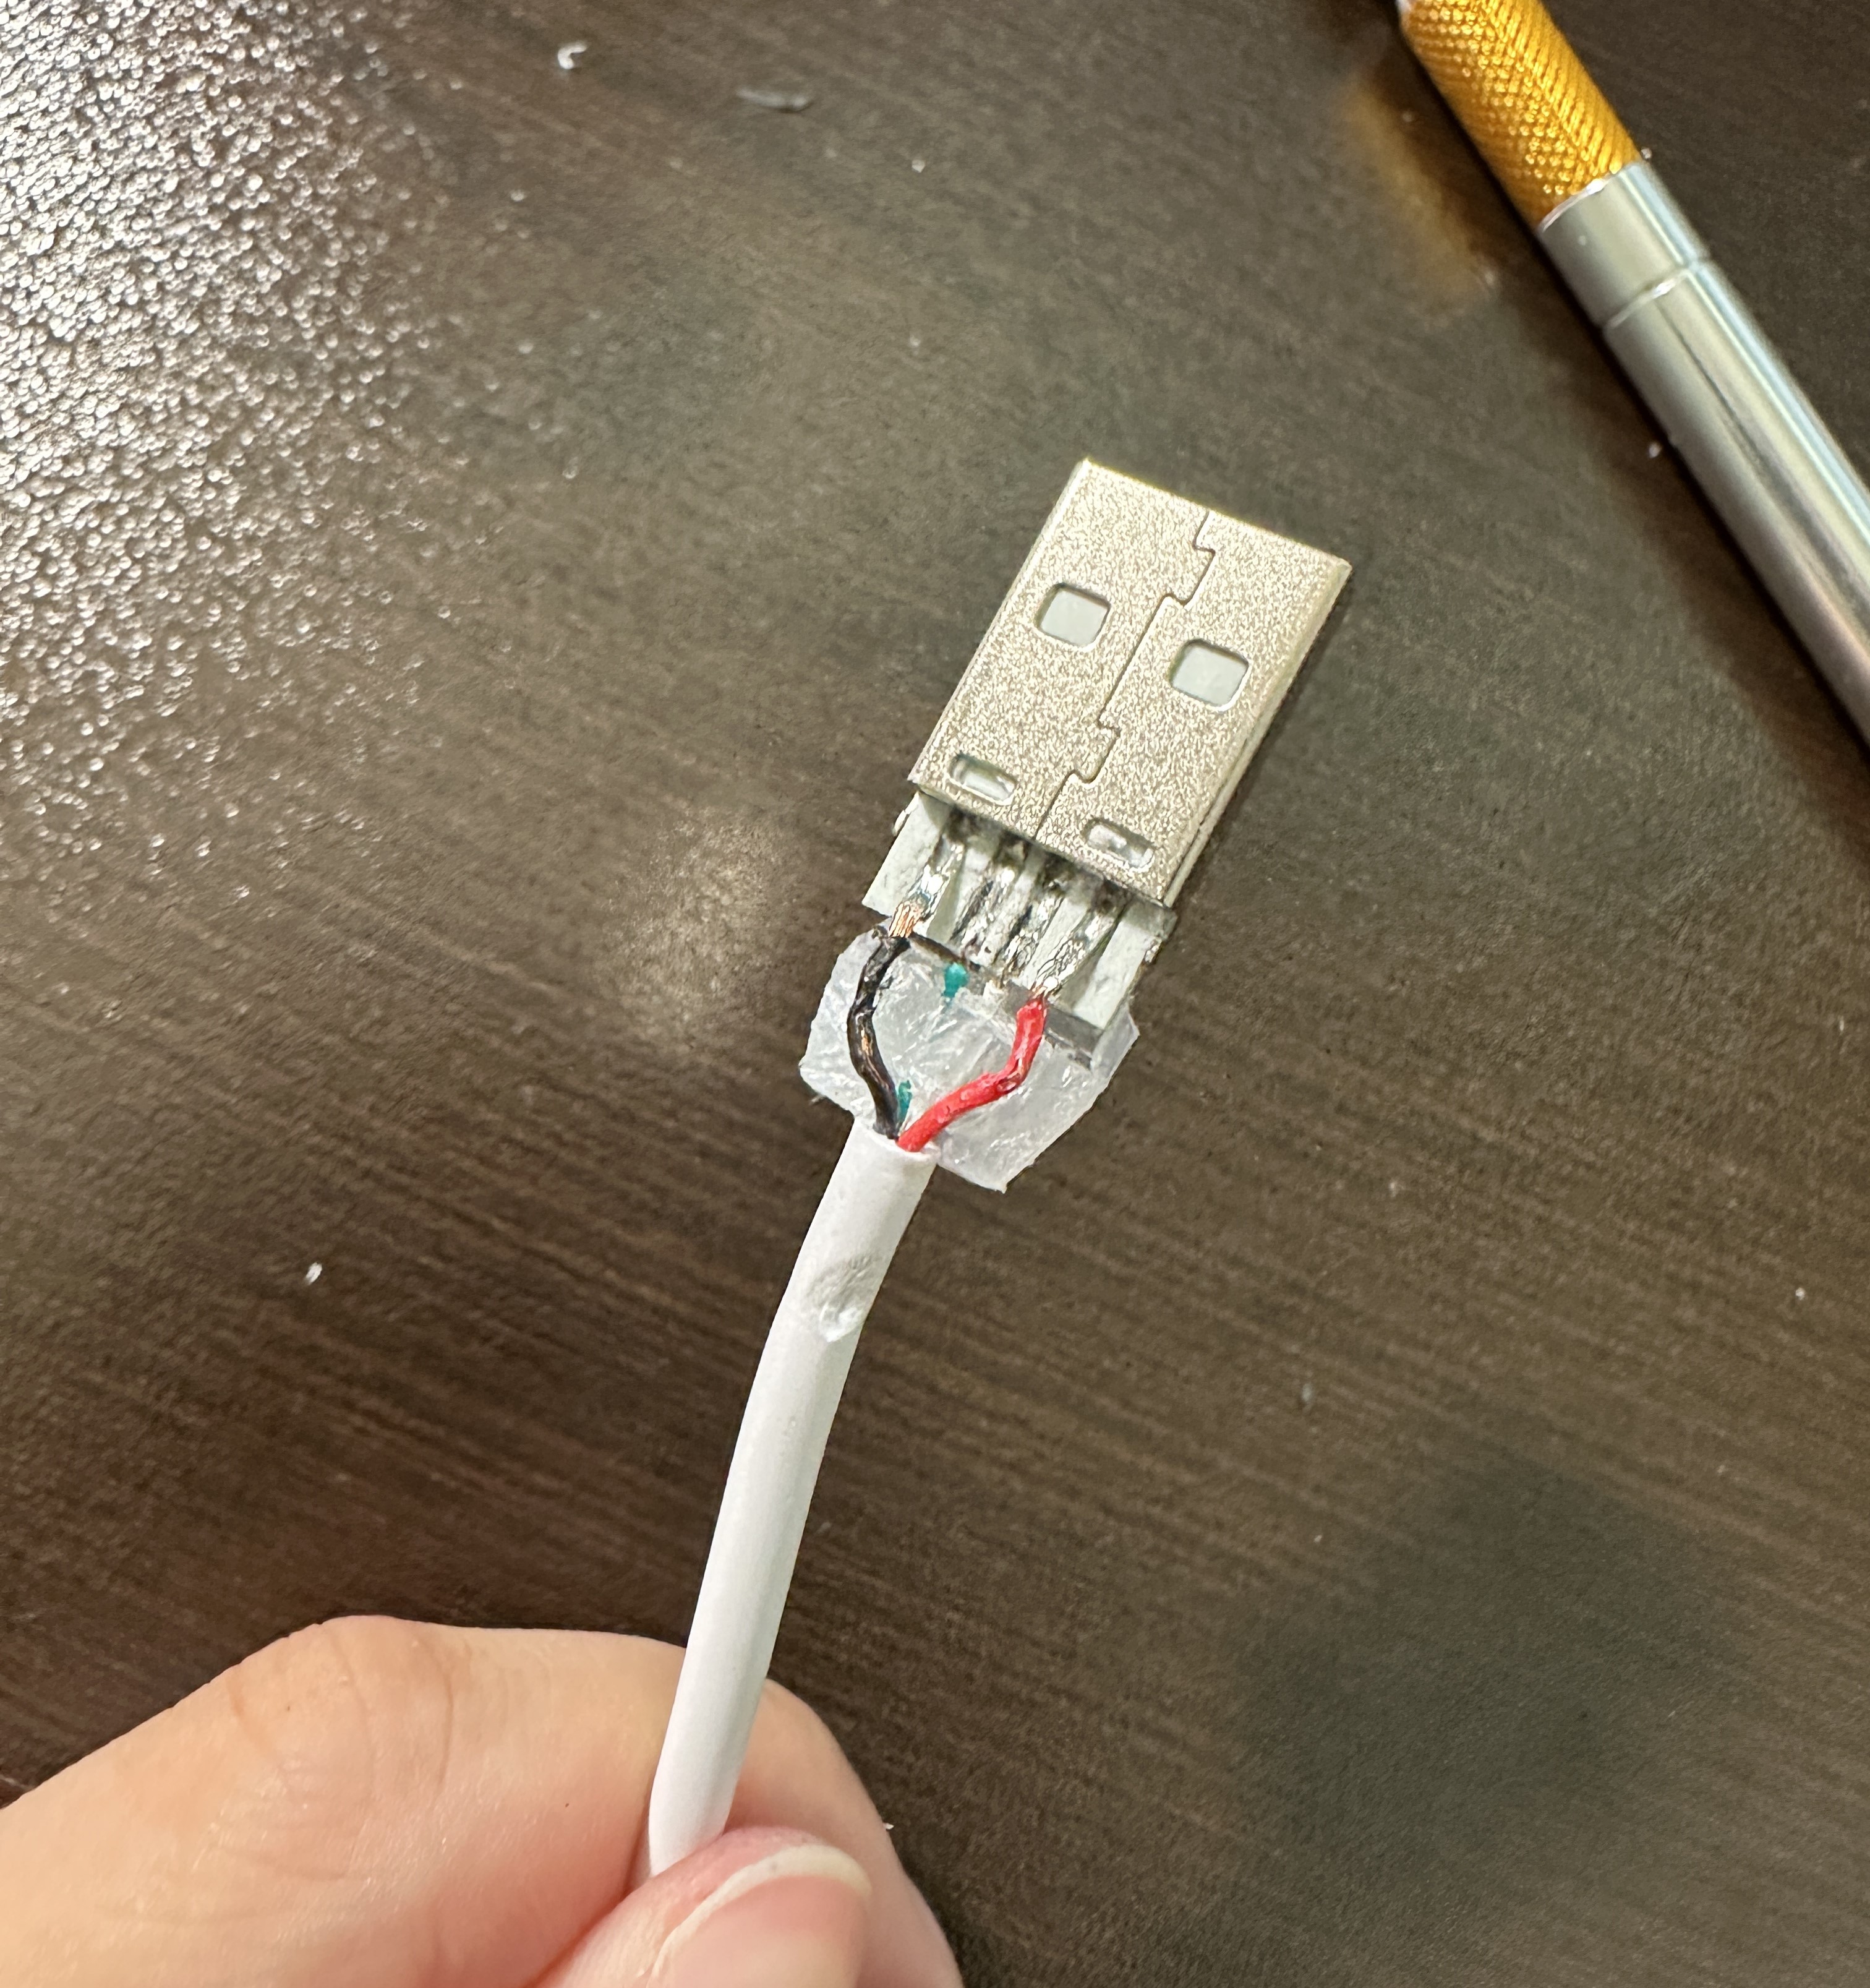
Almost there! My final challenge was to cut away the white channels that held each wire in place on the USB cable. I had learned
my lesson with the scalpel by now, and in a stroke of genius, busted out the nail clippers. They cut through this layer of plastic
like a hot knife through butter.
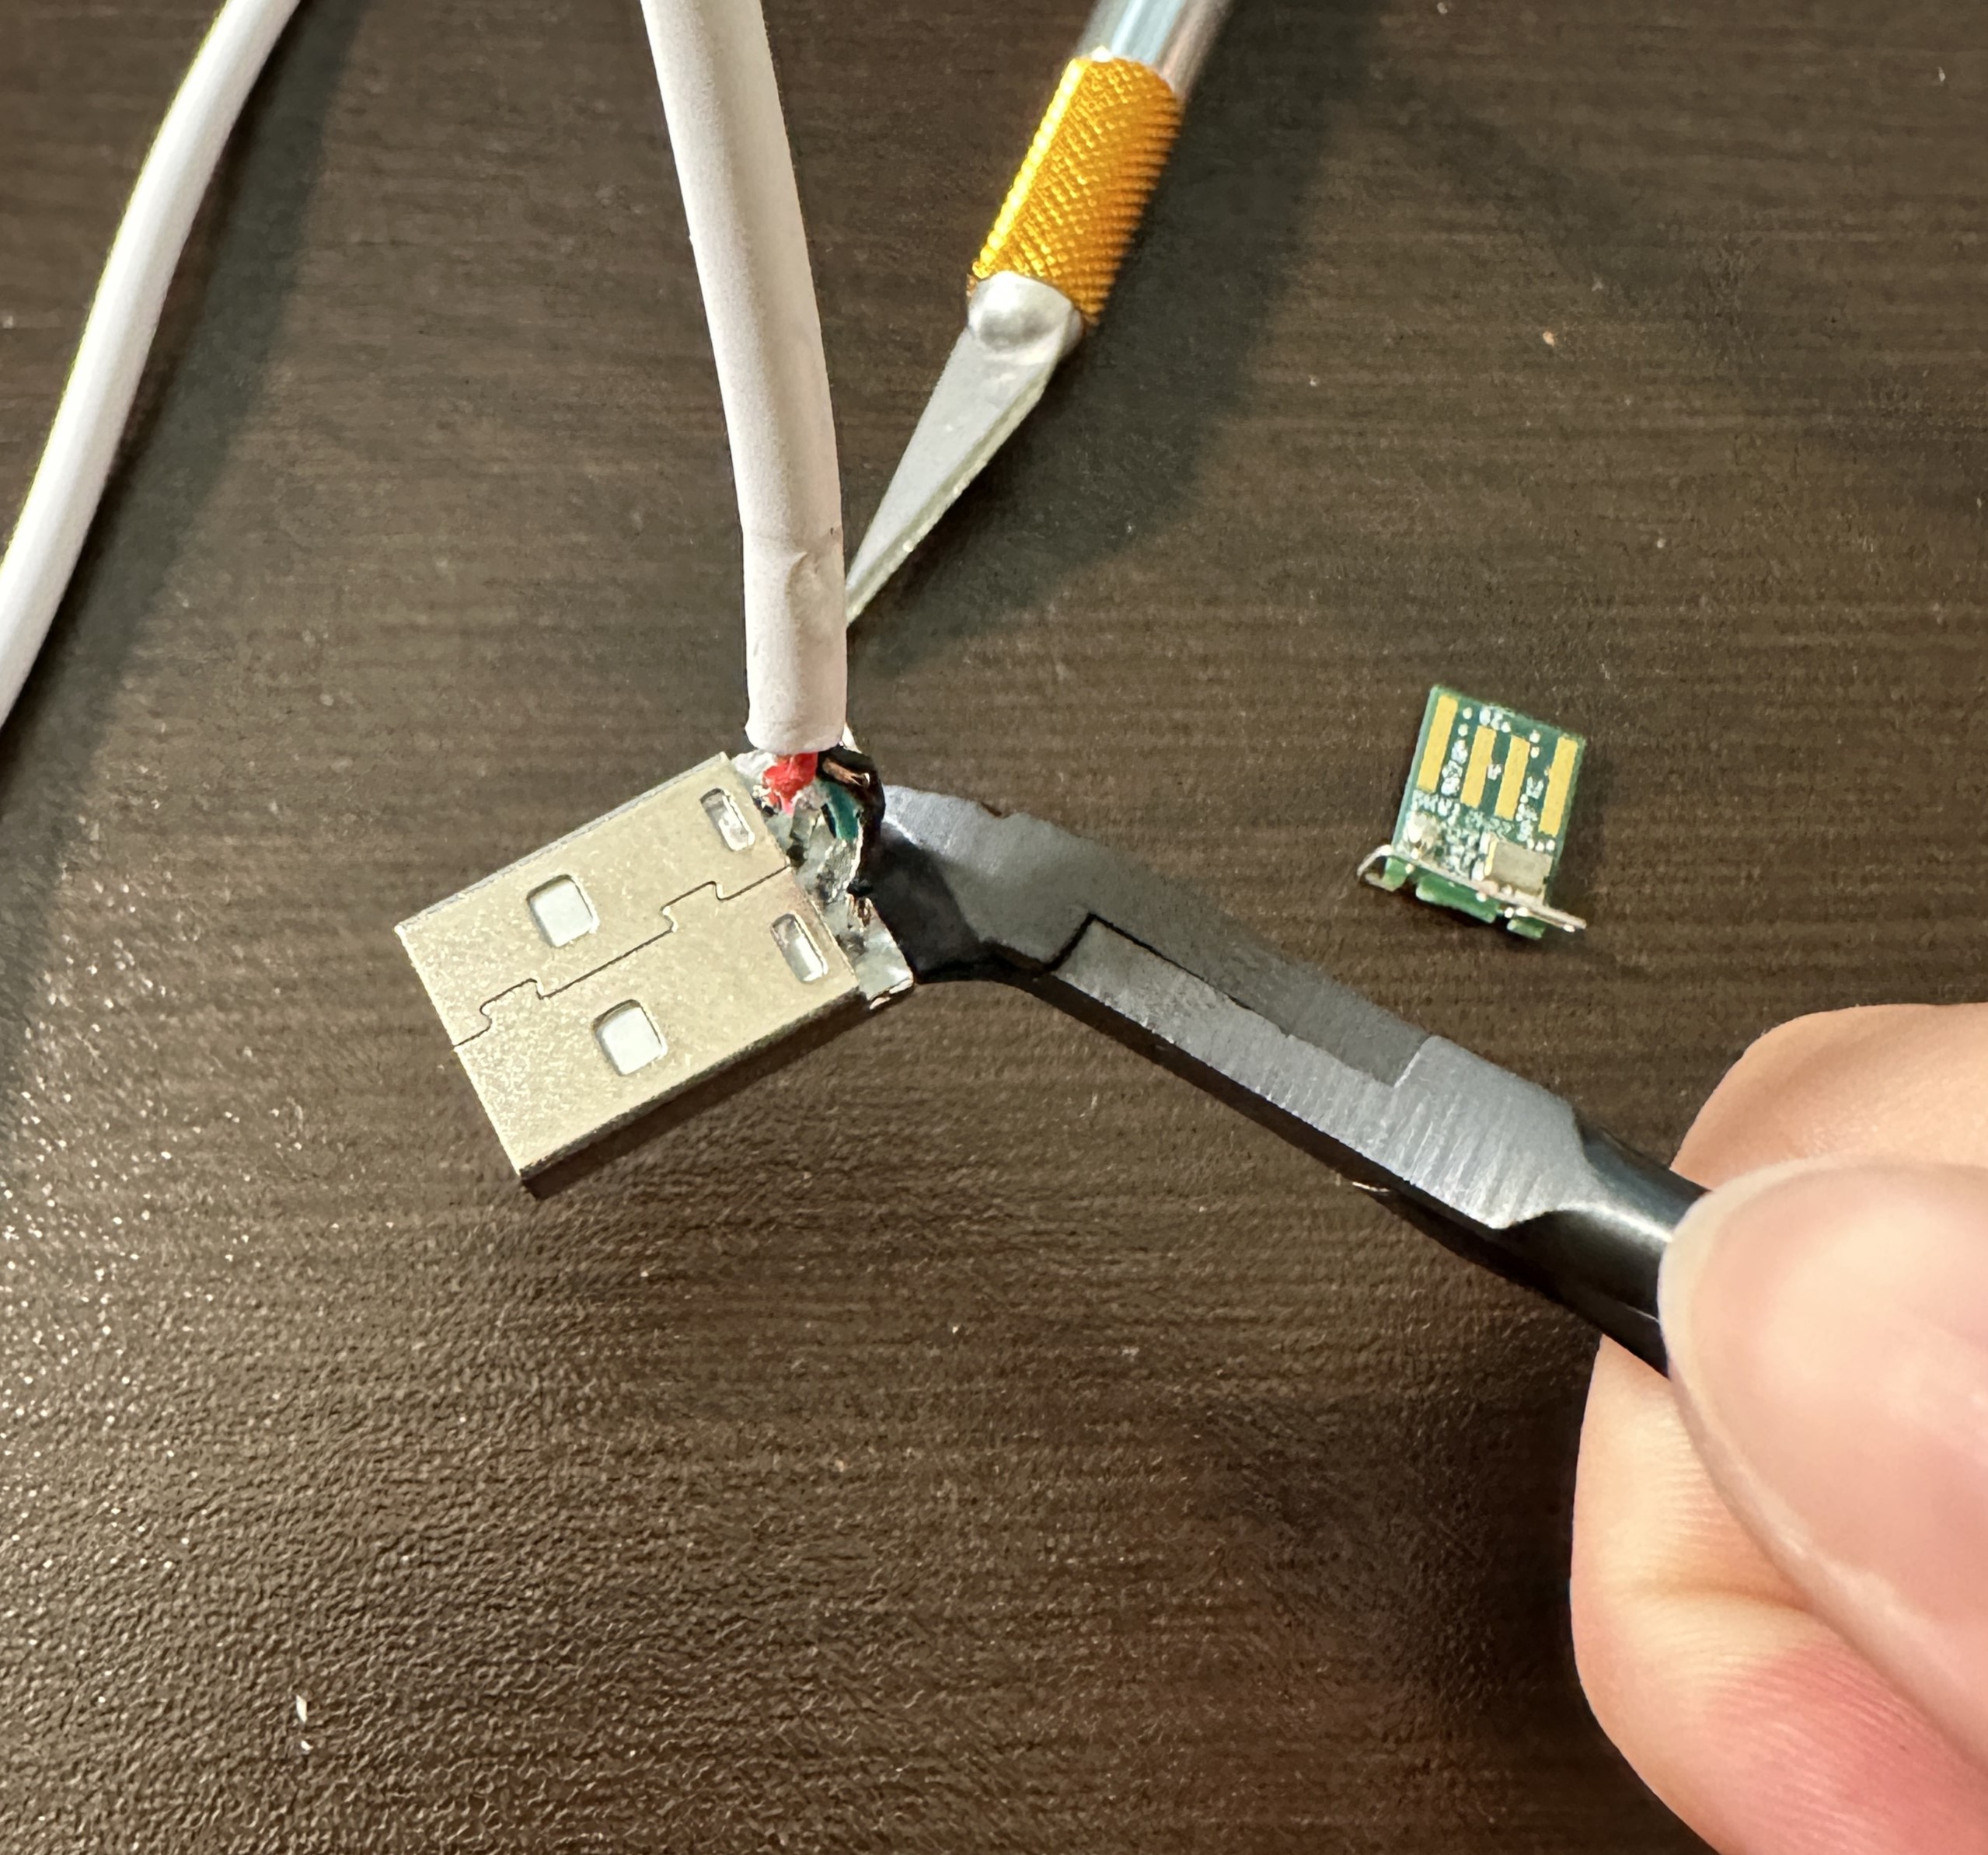
With everything properly exposed, I could finally get to soldering.
A hot mess
My significant lack of tools and experience did not stop at the brute-force stage of this project. As I lacked the clamps suggested
in Luca Bongiorni’s follow up blog post,
I decided I would just wing it and fight against time. Again, I have no idea where I got my confidence from, but I just loaded the pins
with a ton of solder and flux and tried to compress the USB connector onto it before the solder cooled.
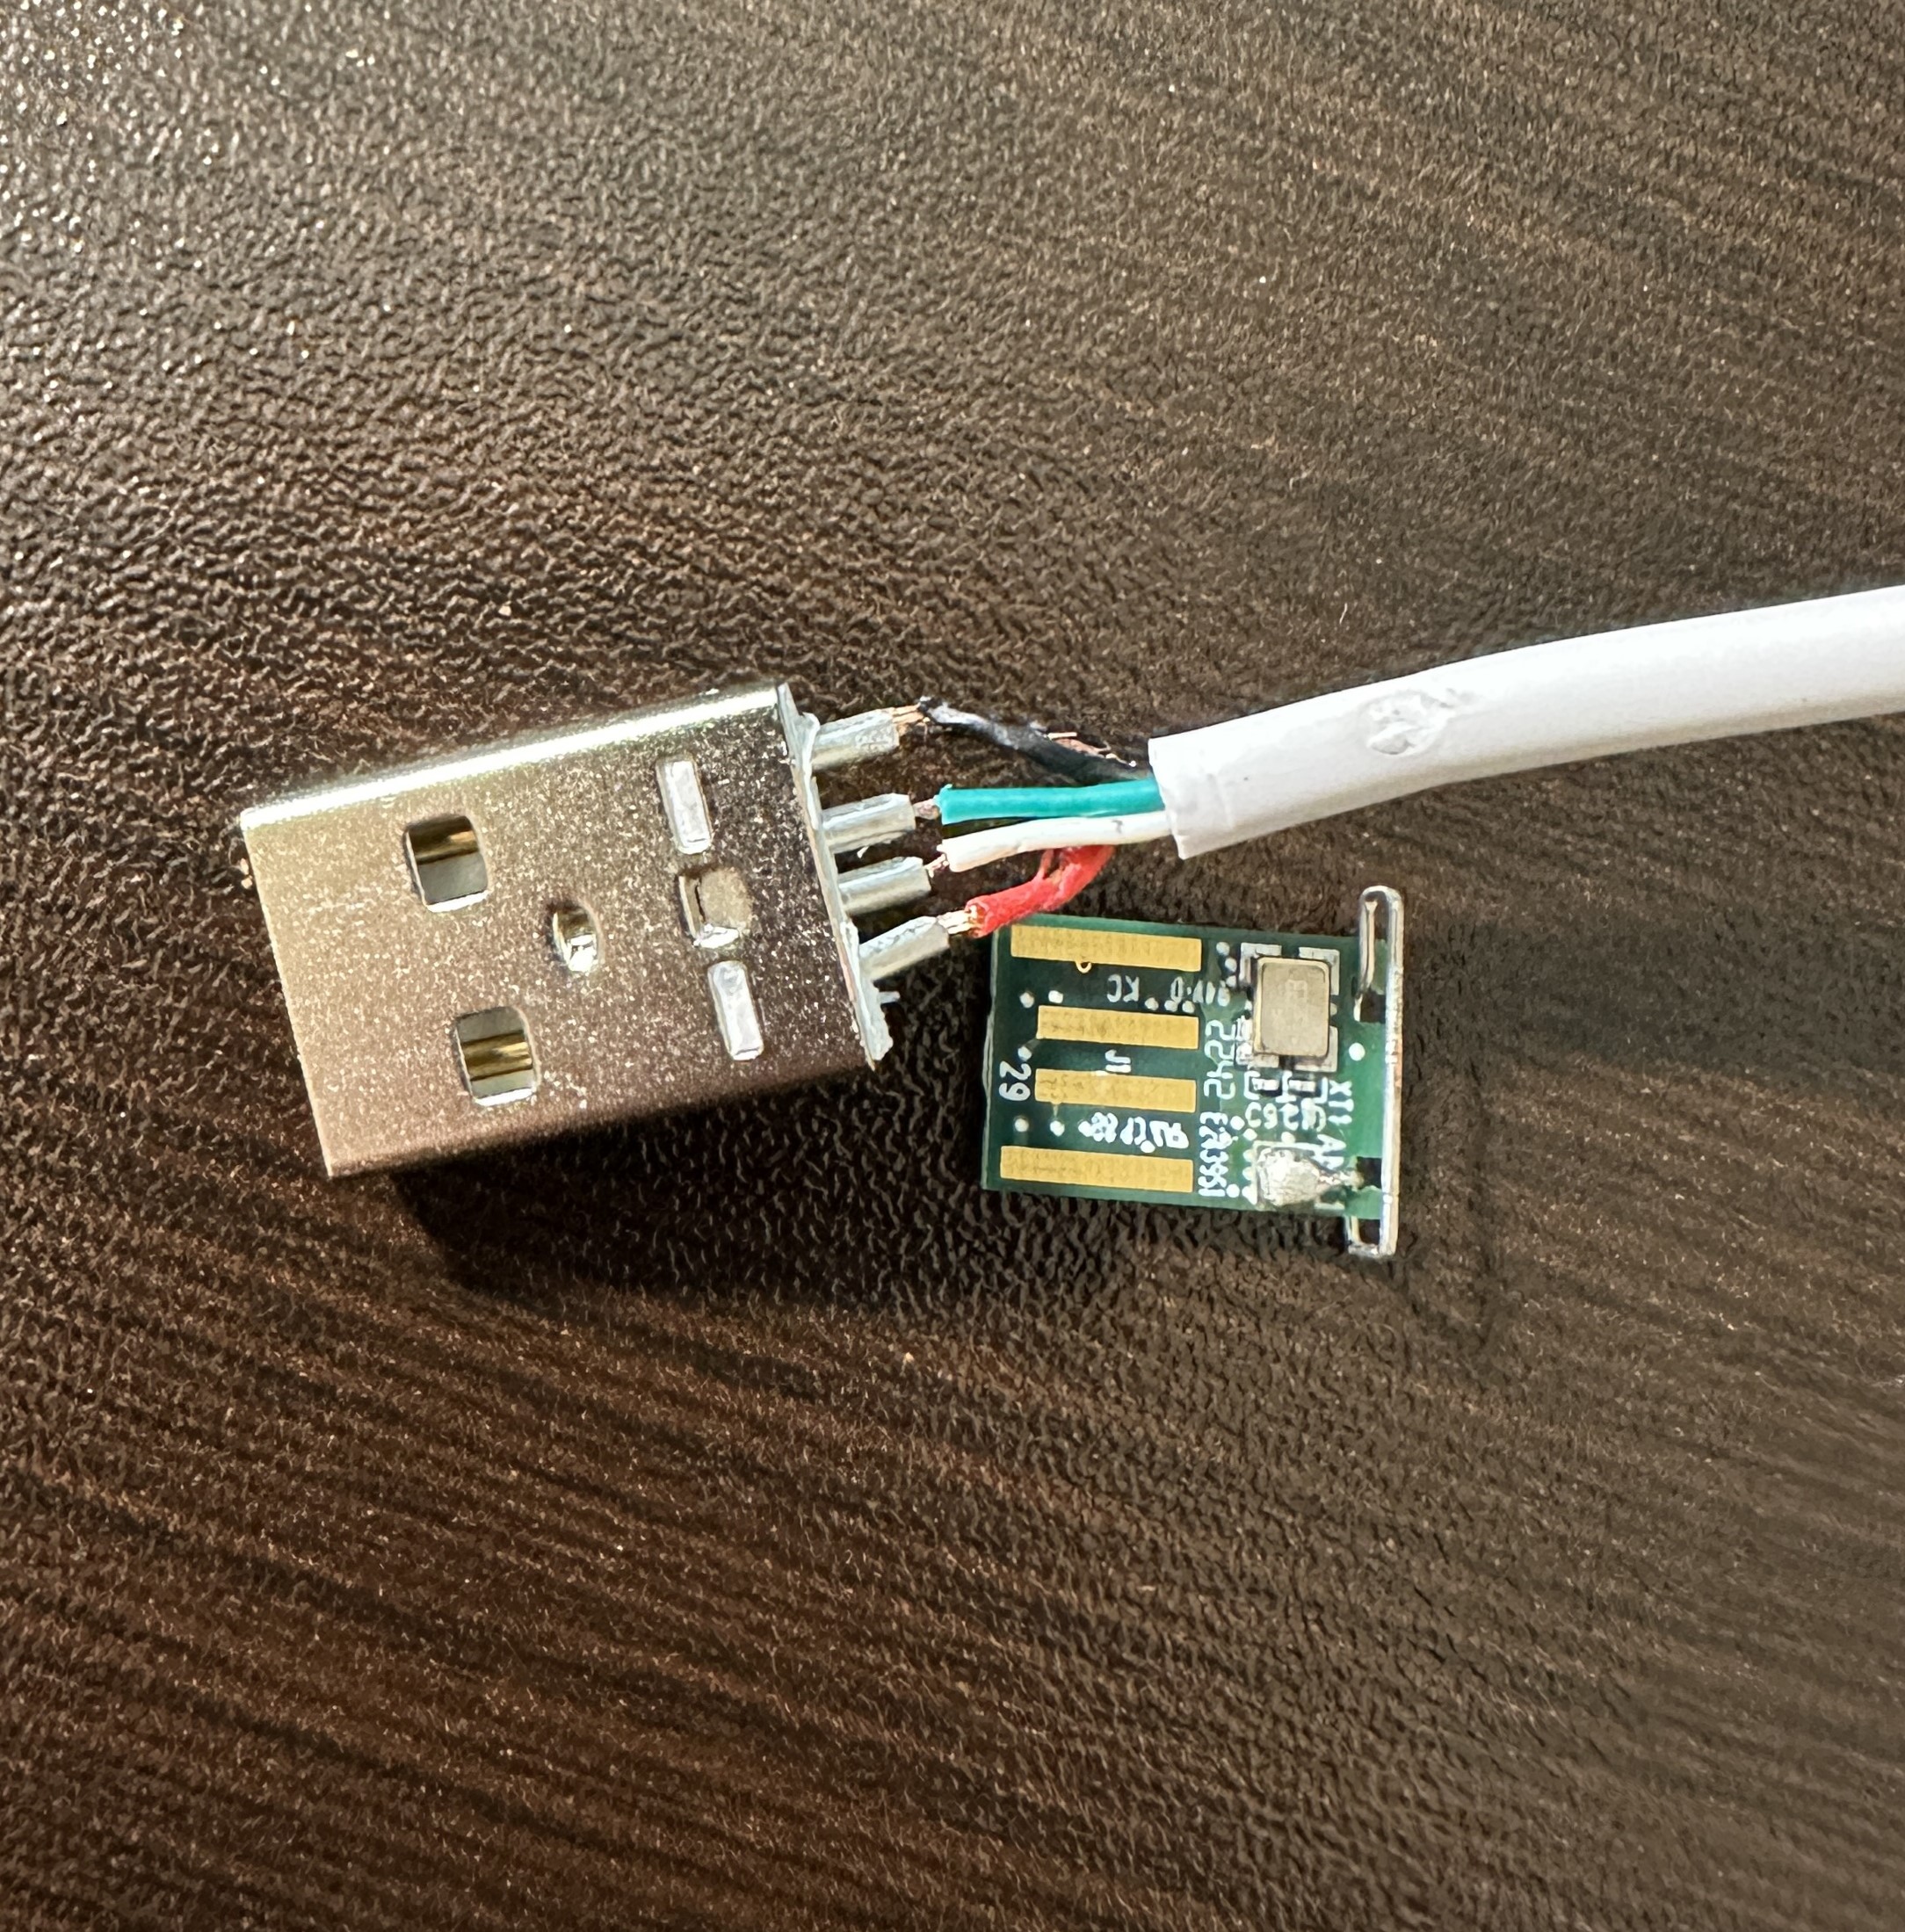
As poorly as it was planned and executed, after a couple of failed attempts, my final result was not terrible. I ended up using my nail
clippers to hold the cable down while I fixed the solder. It’s not pretty, but it did get the job done.
At this point, I had a feeling that I would have to continue tinkering with the cable, so I just pressed what’s left of the chassis together and held it tight with a piece of tape.
The pain continues
This was the moment of truth… I plugged in my cable, bracing for it not to be recognized by my pc. But then, I heard the familiar chime.
Success!! I thought, as my I moved my cursor towards the notification. Well, I had intended to move my cursor, but it was frozen
in place. I quickly unplugged my makeshift cable and reseated my mouse dongle. To my relief, my mouse became responsive again.
I figured having a second Logitech dongle somehow interfered with my original mouse dongle, so I switched my mouse over to a wired connection.
I then plugged my makeshift cable back in, opening device manager to confirm that it had indeed been recognized by my pc. Woohoo!! Success!!
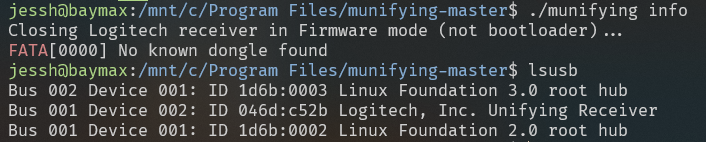
I then went on to install munifying, a
tool that I would be using to flash my cable. However, when running munifying info, I got an error indicating that no dongle was found.

I figured this was due to wsl not recognizing my dongle, which was confirmed after a quick check with usbipd wsl list
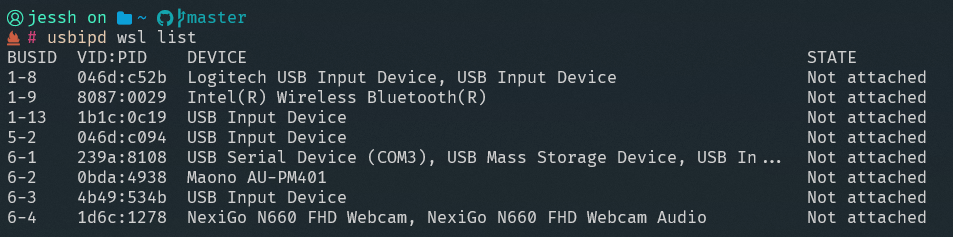
I then attached the dongle to wsl by running usbipd wsl attach --busid 1-8
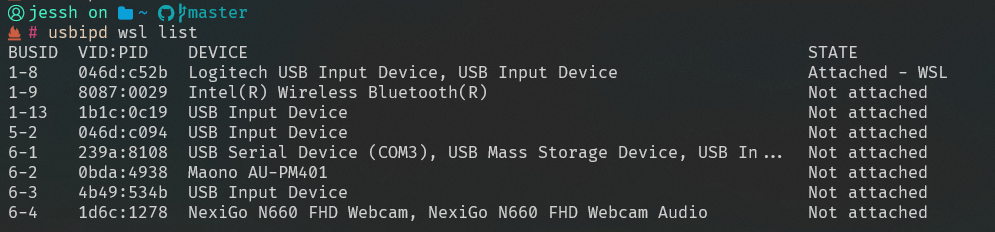
With the dongle now attached, I ran munifying again, hopeful that my dongle would finally be recognized. However, despite wsl recognizing my dongle, munifying continued to throw the same error.
Grasping at straws at this point, I installed Logitech’s Unifying software,
hoping to get some sign that my cable was being recognized. To my delight, the software recognized my dongle and prompted me to toggle the power on my
Logitech device, which of course, did not exist (unfortunately, in my excitement, I forgot to take a screenshot of this). This was enough to prove to
me that my dongle was recognized to some degree, and I figured maybe restarting my computer would help the situation.
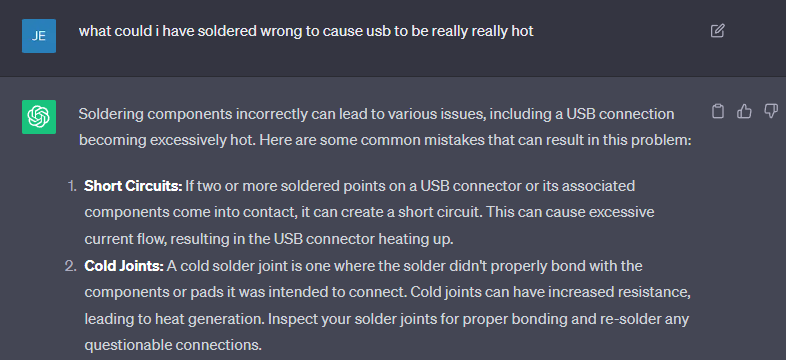
However, when I reached for my makeshift cable, it was getting so hot that I had to let go of it immediately. I then did what any logical person would have done in this situation—enlist the help of ChatGPT.
I also decided to ask about why my dongle rendered my other usb devices unresponsive (I tested this again with other devices plugged in and they also stopped responding, so I figured it was more complicated than just having two Logitech dongles).
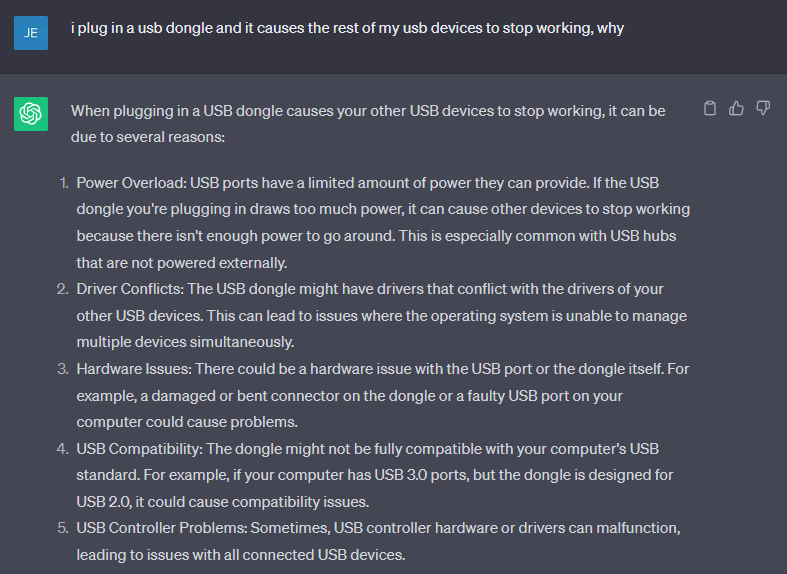
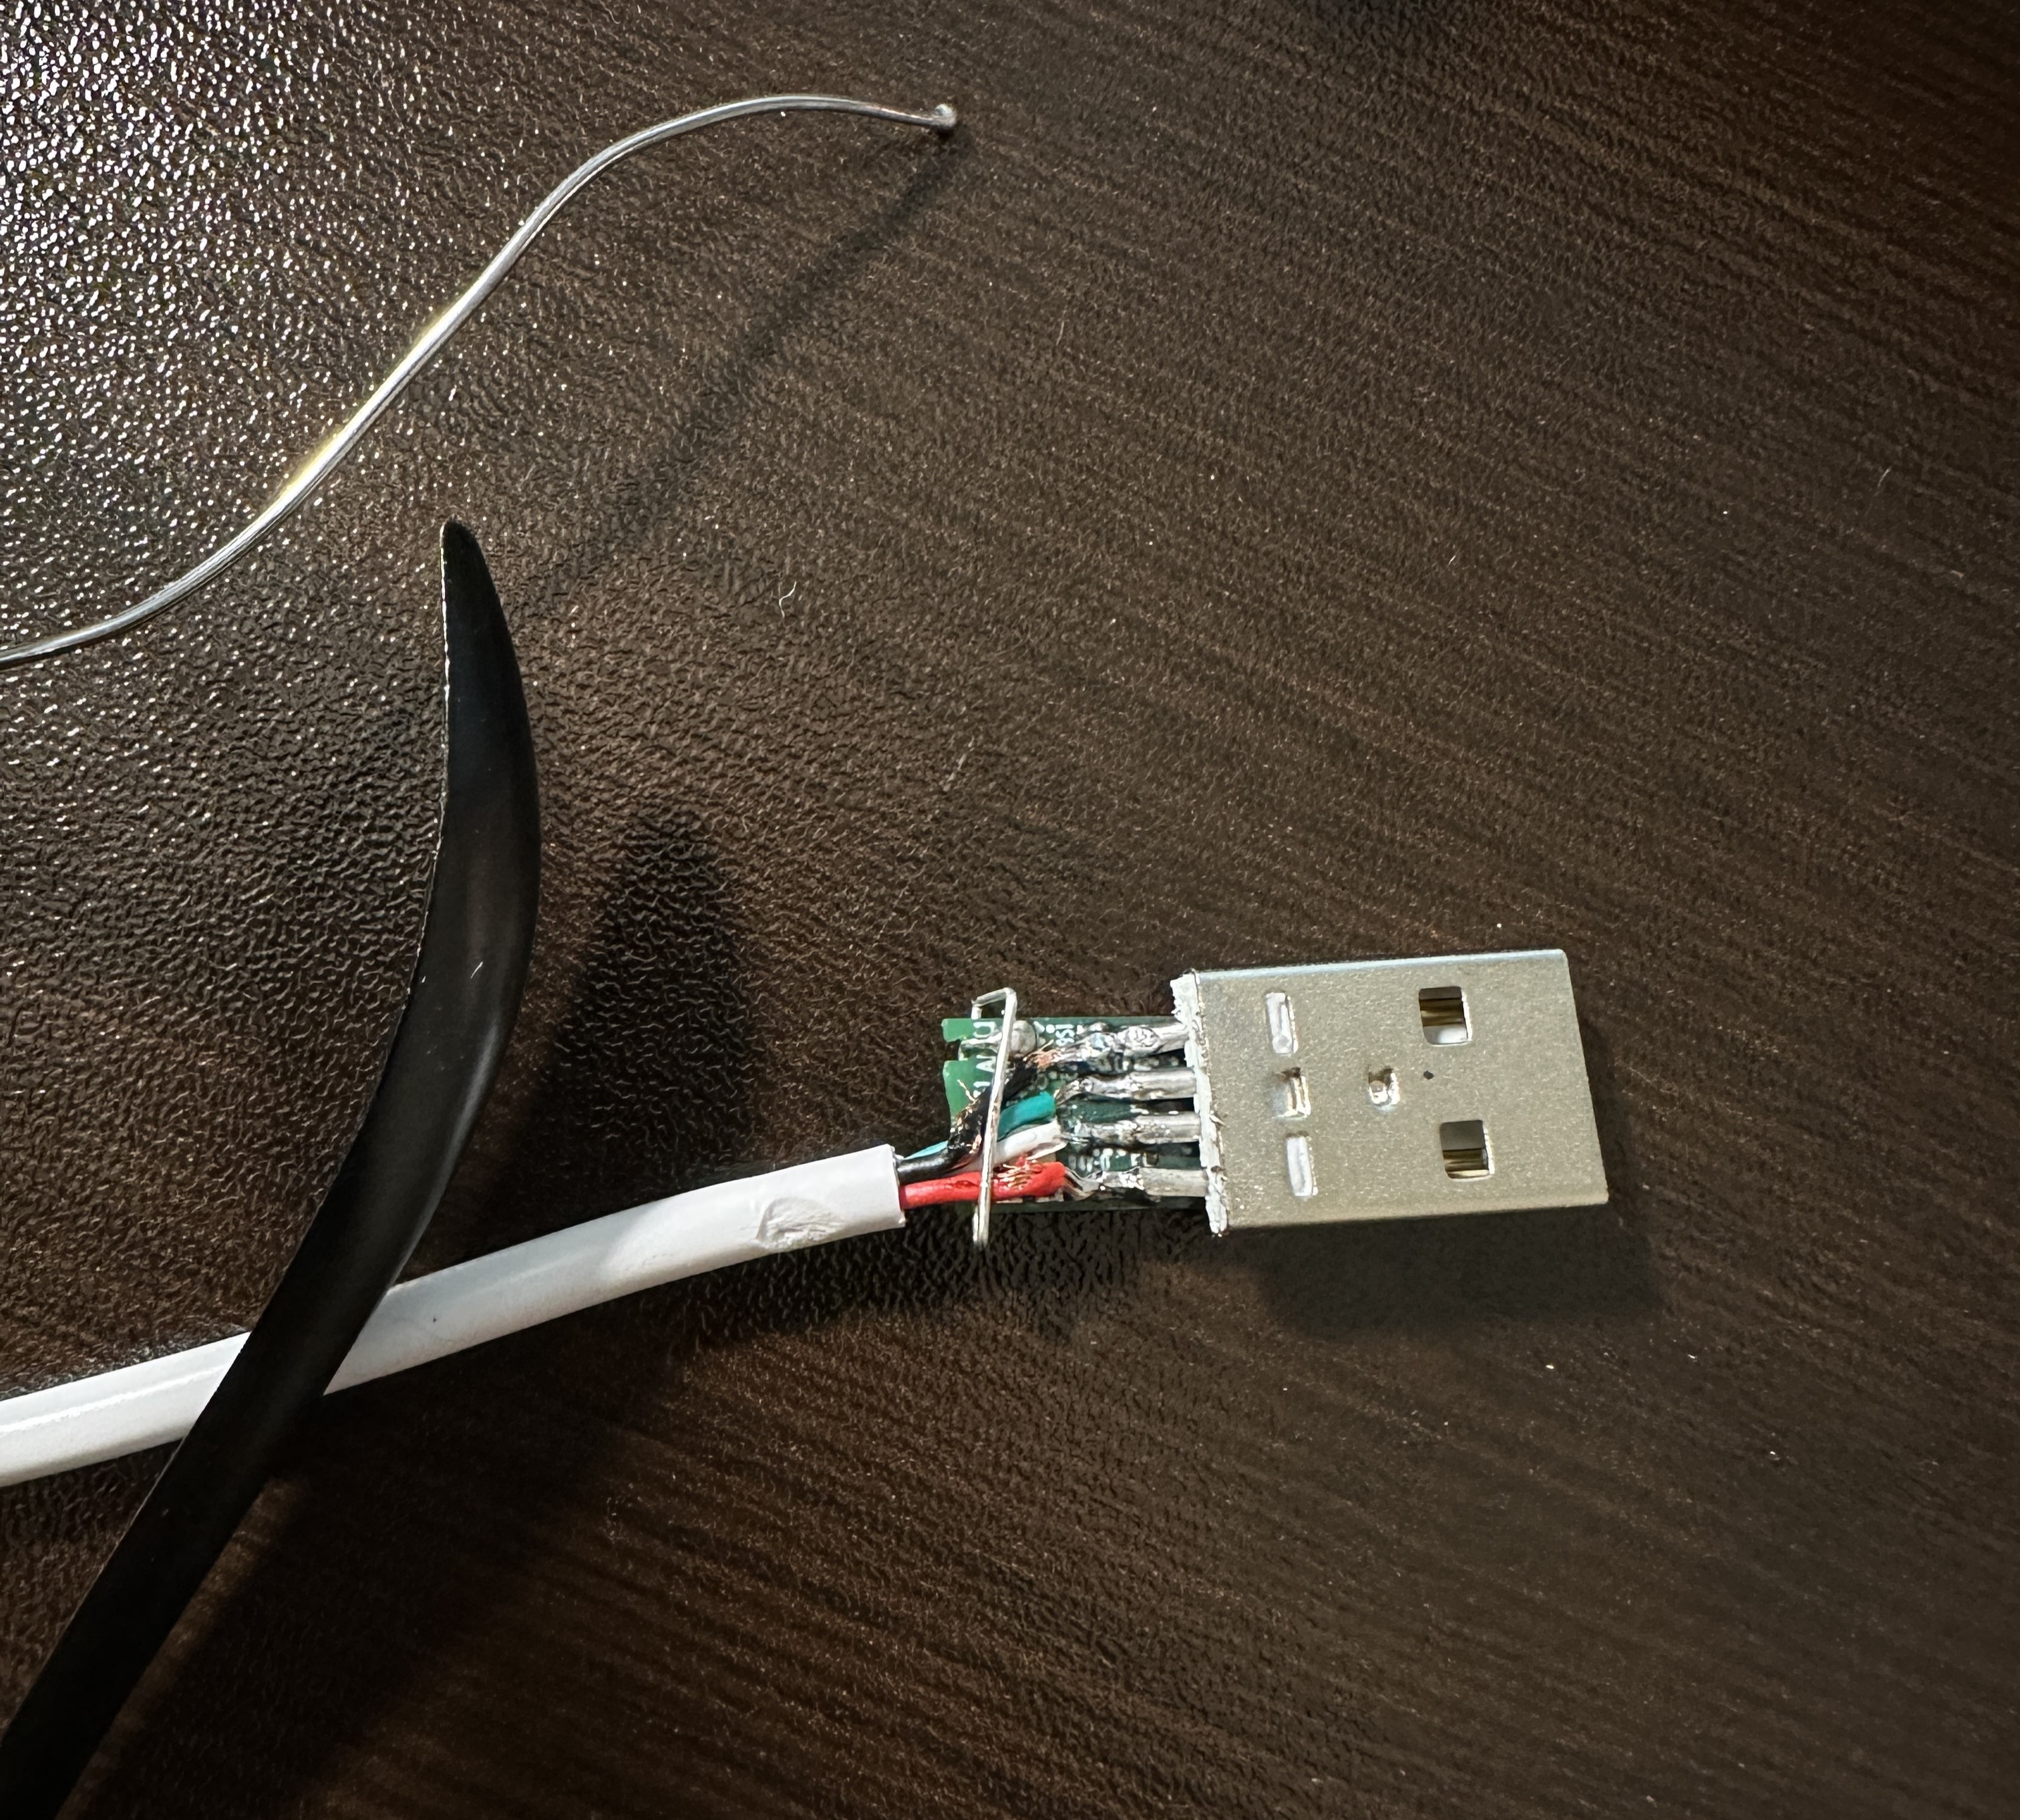
Not the best directed questions, but this gave me some direction. I figured it wouldn’t hurt to restart my computer and open my cable back up
to inspect it in the mean time. I noticed one of the pins was barely making contact with the soldered part. This confirmed ChatGPT’s suspicions of my work having cold joints.
I also noticed that the cable I was dealing with was a data cable, and figured the extra data wires were overcomplicating the issues I was having with the dongle.
Before resoldering the pins, I decided to give the data wires a quick snip and remove them from the equation. Then, I busted out my soldering iron once again, ready
to mend my mistakes. In another stroke of genius, I used some double-sided mounting tape to hold my patient in place.
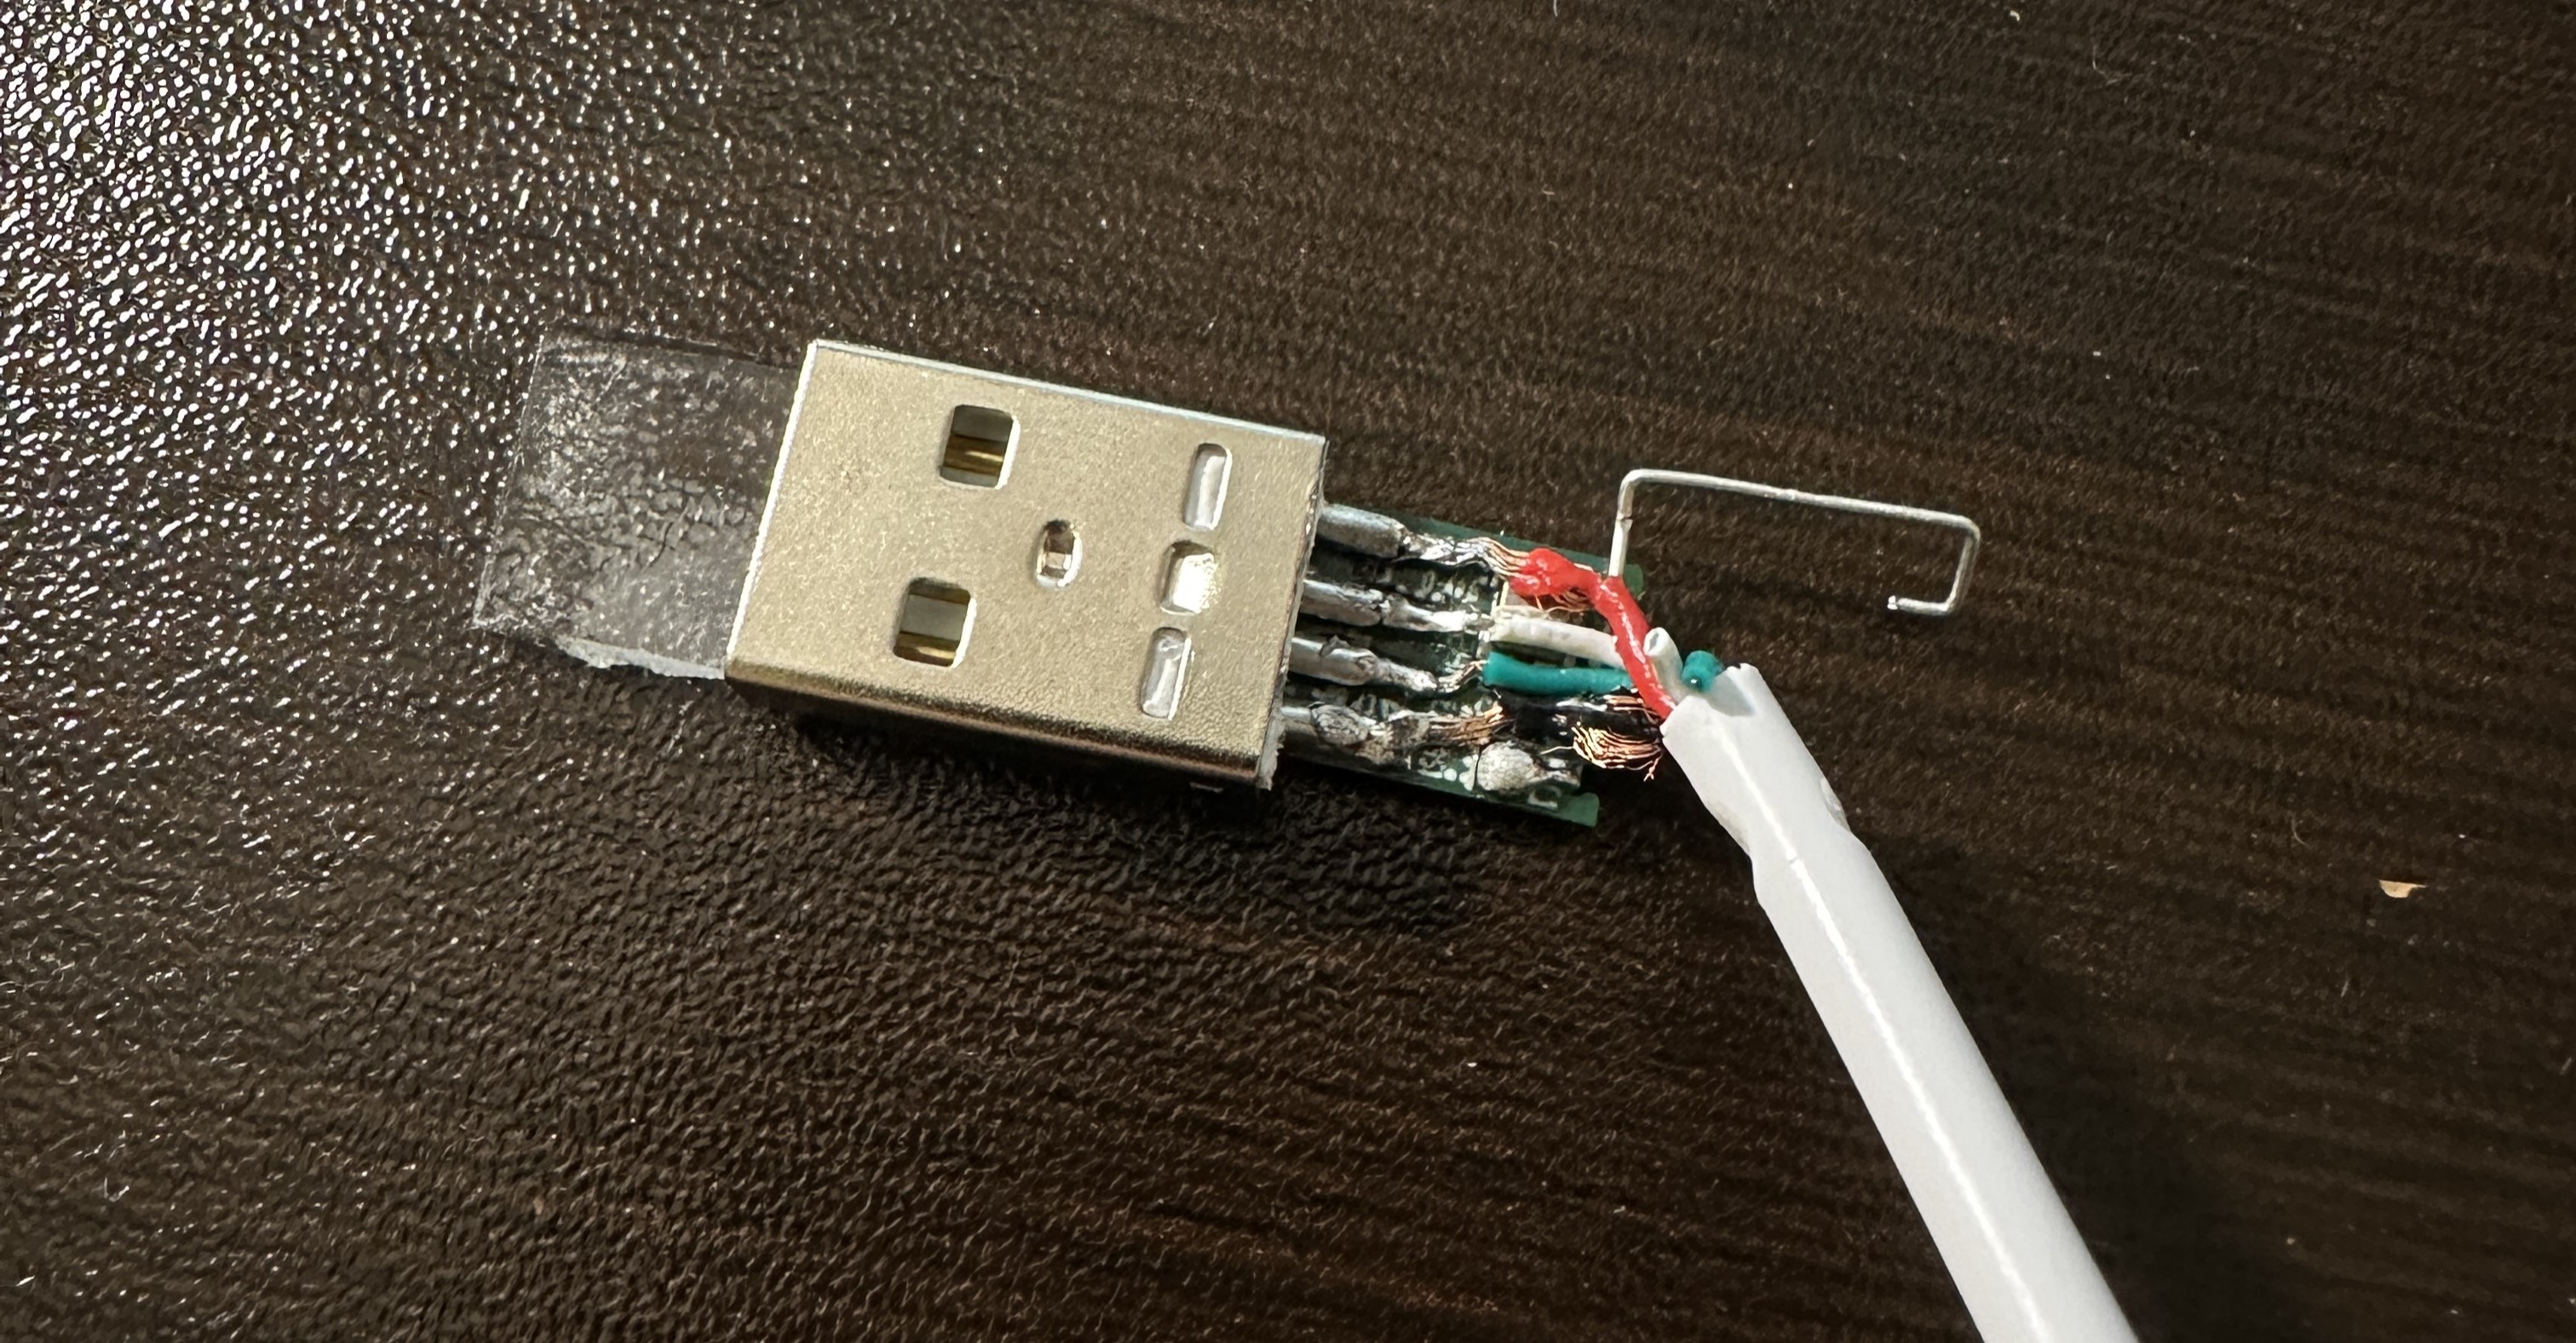
I fixed up the mess as best as I could, trying to neaten up the solder and the wires.
While I waited for my cable to cool, I booted up my Kali VM and got it ready with the munifying software as well, hoping that the process would be smoother within an actual VM.
I then plugged my cable back in, hoping that it would finally be recognized. However, my cable was not getting recognized at all this time. I tried to run the munifying software
anyway, hoping for some miracle, but I was met with the same error.

In a last ditch effort, I went back to my soldering iron and reversed the power and ground wires in my cable, but I knew deep down it would not change the result.
The dongle was not getting recognized, switching wires around wouldn’t change anything.
As expected, nothing changed when I plugged the cable back in. I decided to call it for the night and redirect my efforts to writing this blog post.
Am I giving up on this??
Not at all. First thing I did before starting this post was to order another dongle, which will be arriving in two days. This time, I plan on trying
to get the software to recognize the dongle before I start tinkering so that I can have a proper baseline and also eliminate a potential cause. I will
also apply everything I learned from this attempt, like being more efficient when removing the cable from the chassis, or securing the dongle with
double-sided tape as I soldered.
Hopefully, I can redeem myself in a follow up blog post about my successful attempt and all the cool things I get to do with my new RF-controlled malicious USB.